Sanding 3D Prints: Tools for Professional Finishes
Sanding Tools for Professional Results
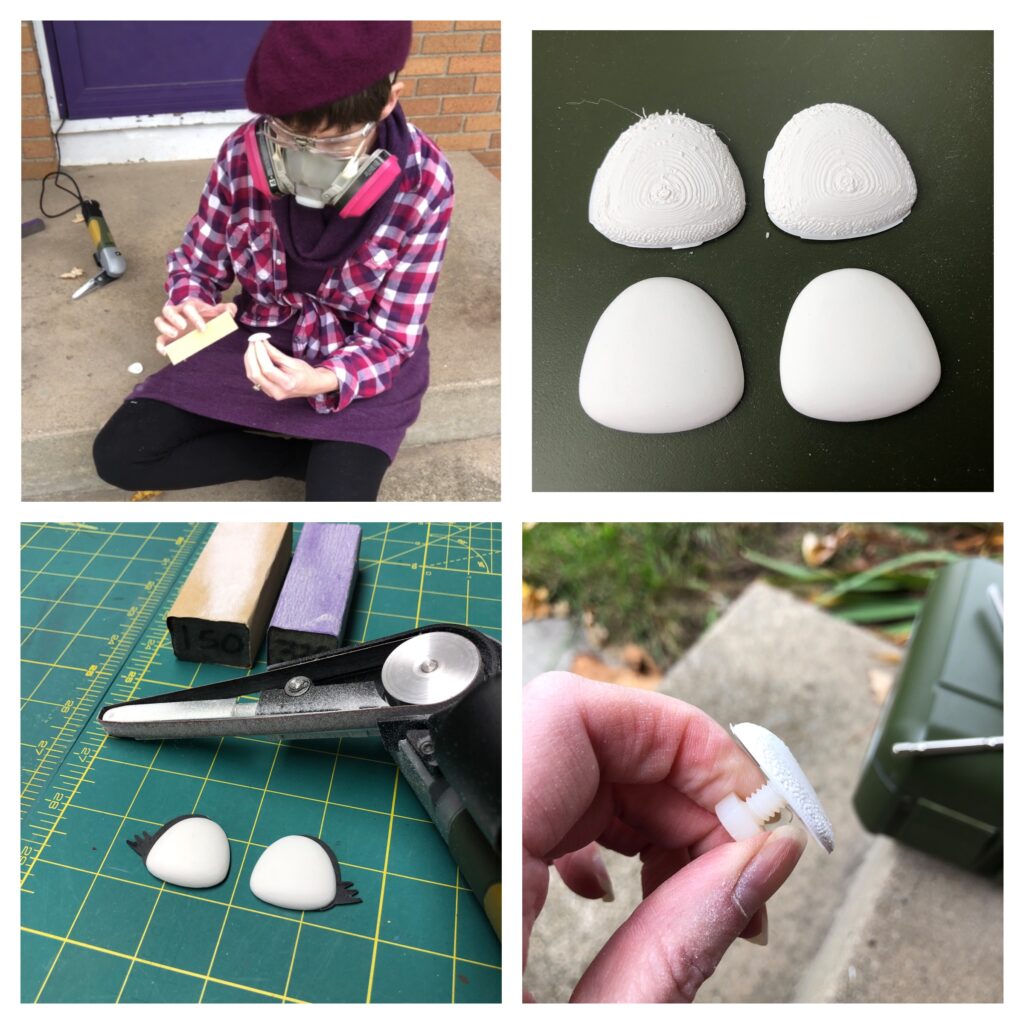
I love 3D printing for creating unique puppet eyes, but the eyes are never ready to use right away. The curved shapes show layer lines. Sanding is a must. I print my eyes using ASA or ABS filament. It allows for sanding and can be tapped (cut to create a threaded hole) to receive nylon hardware. PLA doesn’t sand well. It melts. It also doesn’t tap well for me. There is a workaround with PLA using filler, but I prefer avoiding that extra step. You could use rivet nuts instead of tapping, but they would add extra weight to the eye. Here are some of my favorite tools for smoothing the layer lines on 3D prints printed in ABS or ASA filament.
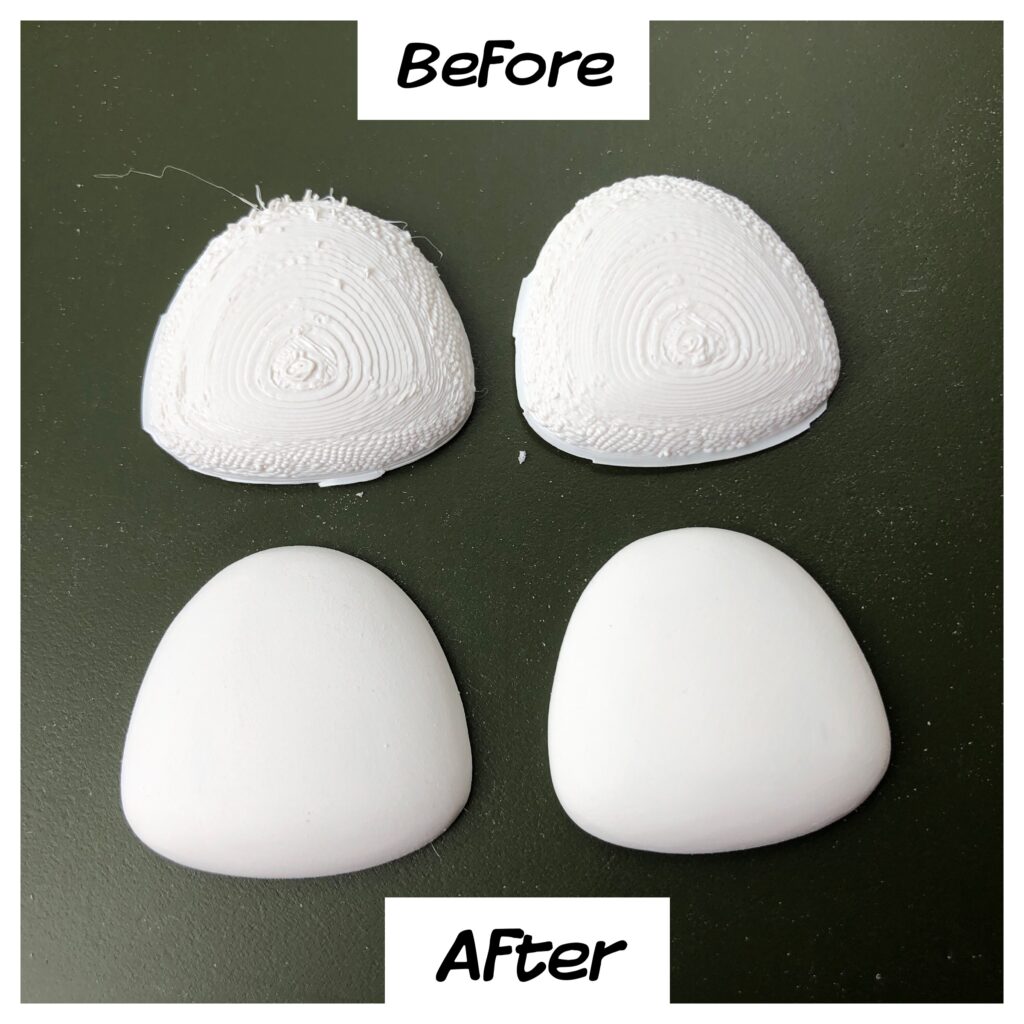
The photo above illustrates a poor-quality 3D print that turned out fine after careful sanding.
Power Sanding Tools

It’s possible to hand-sand 3D prints. I did this initially until I started printing puppet shoe bases to make homemade sneakers for full-body puppets. They were very time-consuming to hand sand!
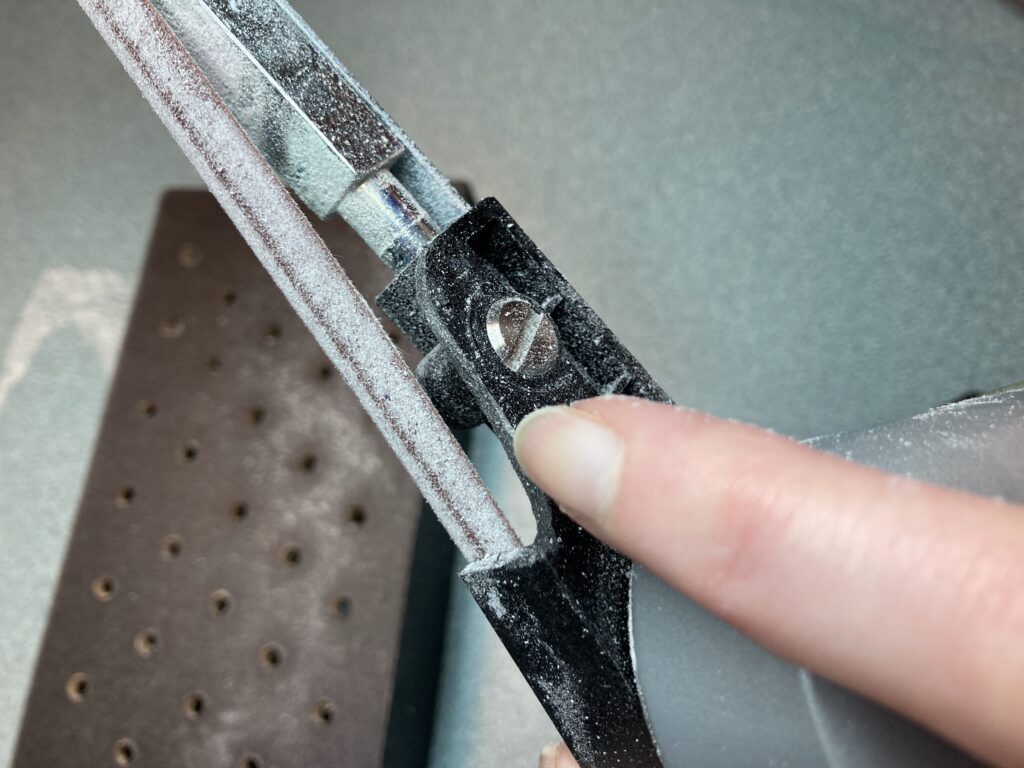
Pasha Romanowski of Project Puppet recommended the Proxxon Mini Belt Sander as an electric option to speed up the process.
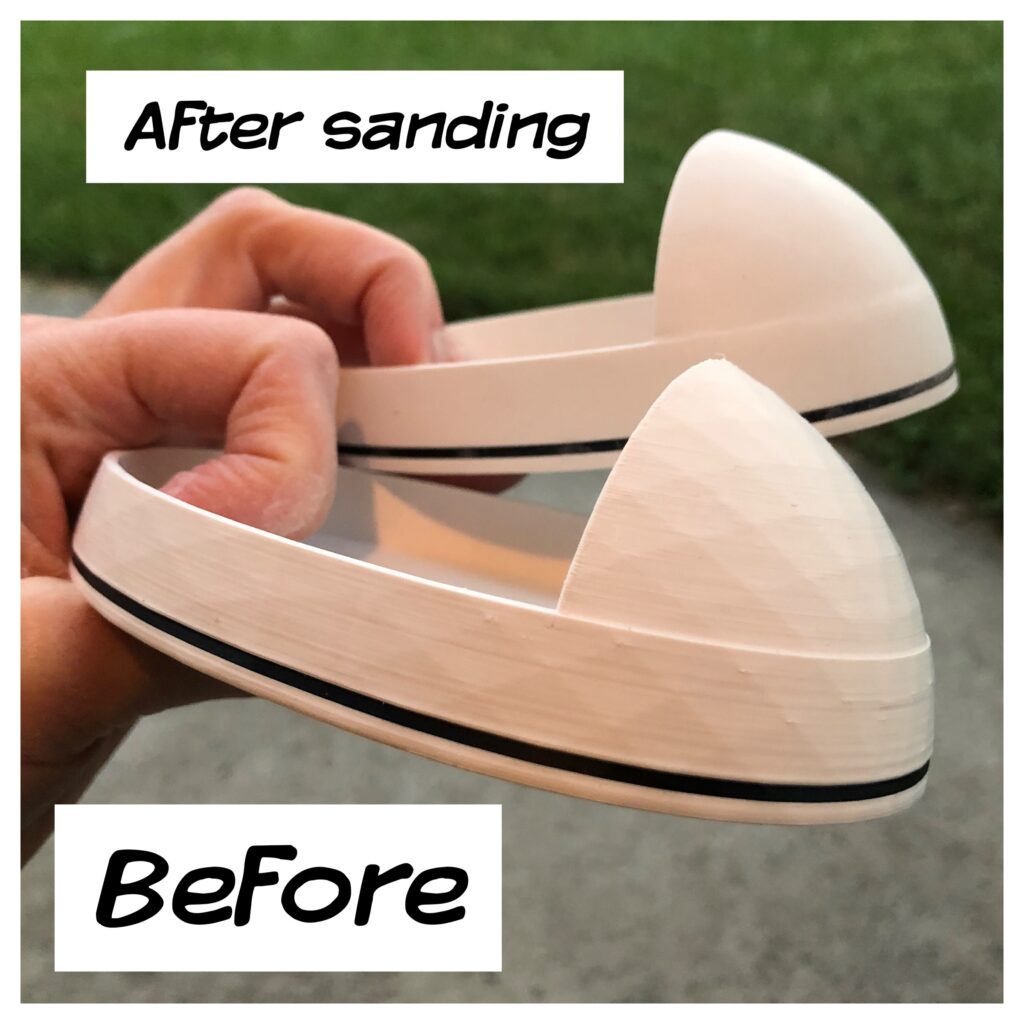
I cut away some of the plastic guard to increase the usable sanding surface. This allows the sand paper to bend around the curves in prints. There are also free-standing belt sanders with 1″ sanding belts, but look to see how much of the belt is backed by a flat metal plate area. You want a flexible sanding zone right above that plate.
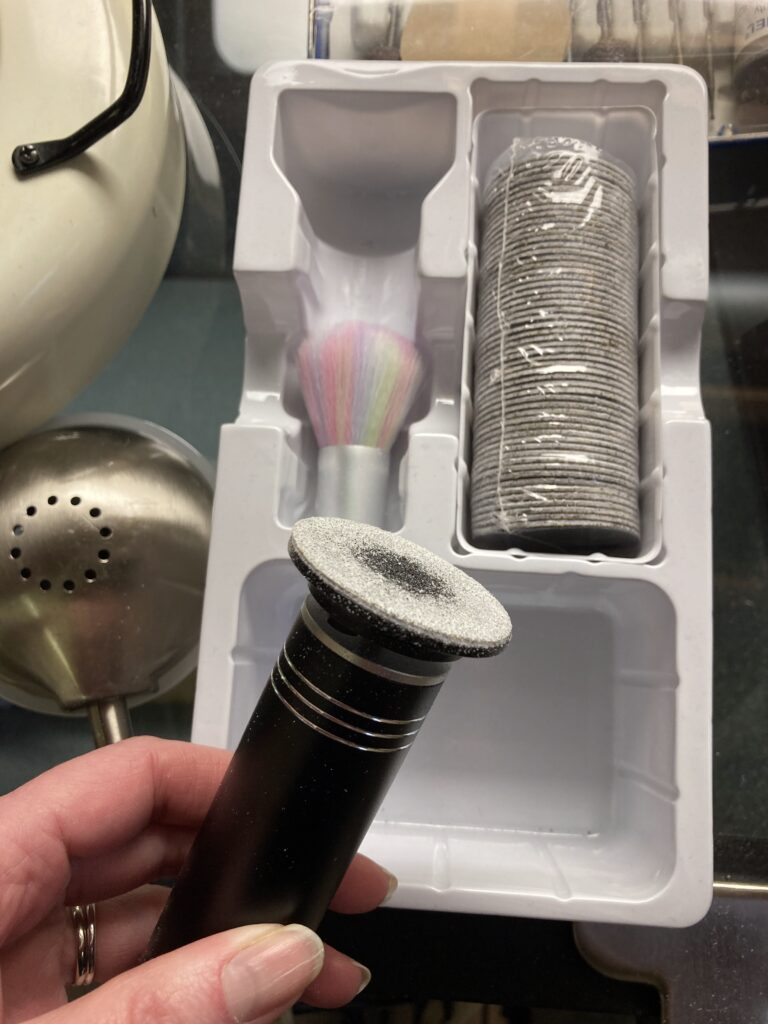
An even less expensive electric option is a pedicure tool. This is a foot callus sanding tool. It cost $33 at the time of this writing. It’s available on Amazon. The self-adhesive discs are easy to replace. The grit is not listed, but it’s coarse. I’d guess 80 grit. My current habit is to use this to knock down obvious print lines. Next, I use a finer 180 grit on my Proxxon belt sander. I finish with hand sanding using 180 and 320 grit hand sponges. The foot sander has a firm working zone with no flex, so I don’t use it exclusively, but it’s an easy first step.
Hand Sanding Tools
You can avoid power sanding all together and sand 3D prints by hand. It’s actually safer because the plastic dust doesn’t get kick up into the air. You should still use PPE to protect your eyes and lungs. See my post on sanding safety here.
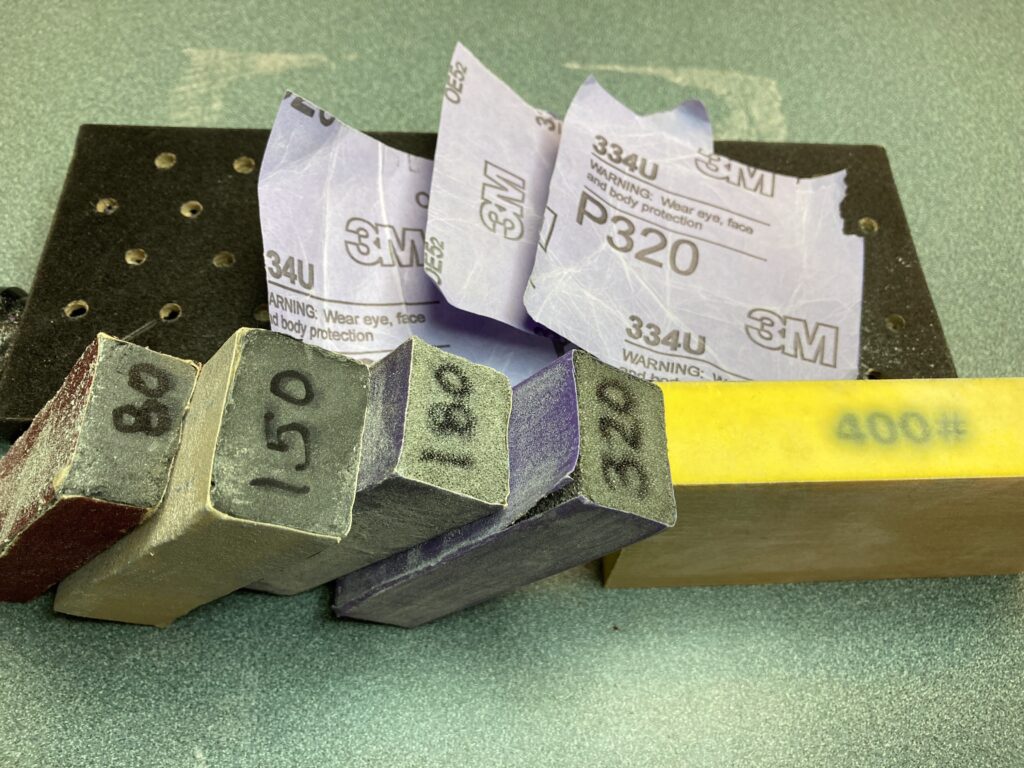
I use a variety of grits. I start with 80 grit to knock off harsh geometries and then move to finer grits like 180 and 320 near the end. You can use the sheets cut to squares, or you can make the sandpaper easier to hold by gluing it to firm sponge blocks. The hardware store carries sanding sponges, but I like mine a similar scale to those used by nail technicians. They are called nail buffing blocks. They are easy to hold! You can buy a variety of grits on Amazon, or make your own.

How to Make Homemade Sanding blocks

The foam base is made from scrap I purchased at a junk store. I don’t have a good source recommendation. One of my sponges feels like closed cell EVA. The remaining sponges look and feel like open-cell, high-density poly foam. Aim for a firm foam.
Cut your sandpaper to size by rolling it in the sandpaper and marking the needed length. Glue the sandpaper to the foam with contact cement. Apply the glue in a well-ventilated area with protective gloves. See my future blog post on my ventilation cabinet for a DIY solution for pulling fumes away from your work zone. The contact cement should be applied to both the sandpaper and the foam surfaces. Once the cement is tacky (a few minutes), attach the sandpaper to the foam. Trim if needed.
Sanding 3D Prints Safety
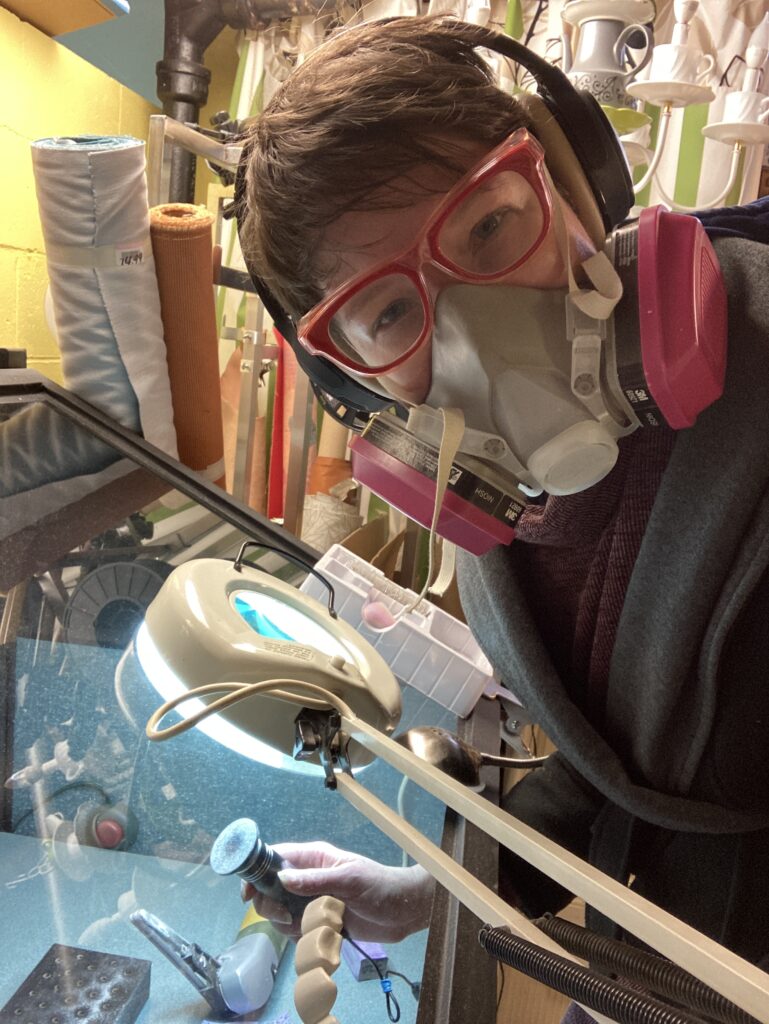
If you are concerned about microplastics, you need eye and lung protection for sanding 3D prints. If you aren’t concerned, you should be. Plastic dust gets all over your shop and clothing when you sand. It also gets in your lungs. It took multiple trips to Urgent Care and my doctor to take this safety issue seriously. Learn from my mistakes and wear a respirator (or minimally, a mask) plus safety glasses. If you feel heaviness in your lungs during or immediately after sanding, you aren’t protected enough. See my blog post on sanding safety here. See my post on how to create a downdraft sanding station here. The downdraft station pulls the microplastic dust into a vacuum bag instead of allowing it to land all over the shop or in your lungs.
Magnification and Lighting for Sanding
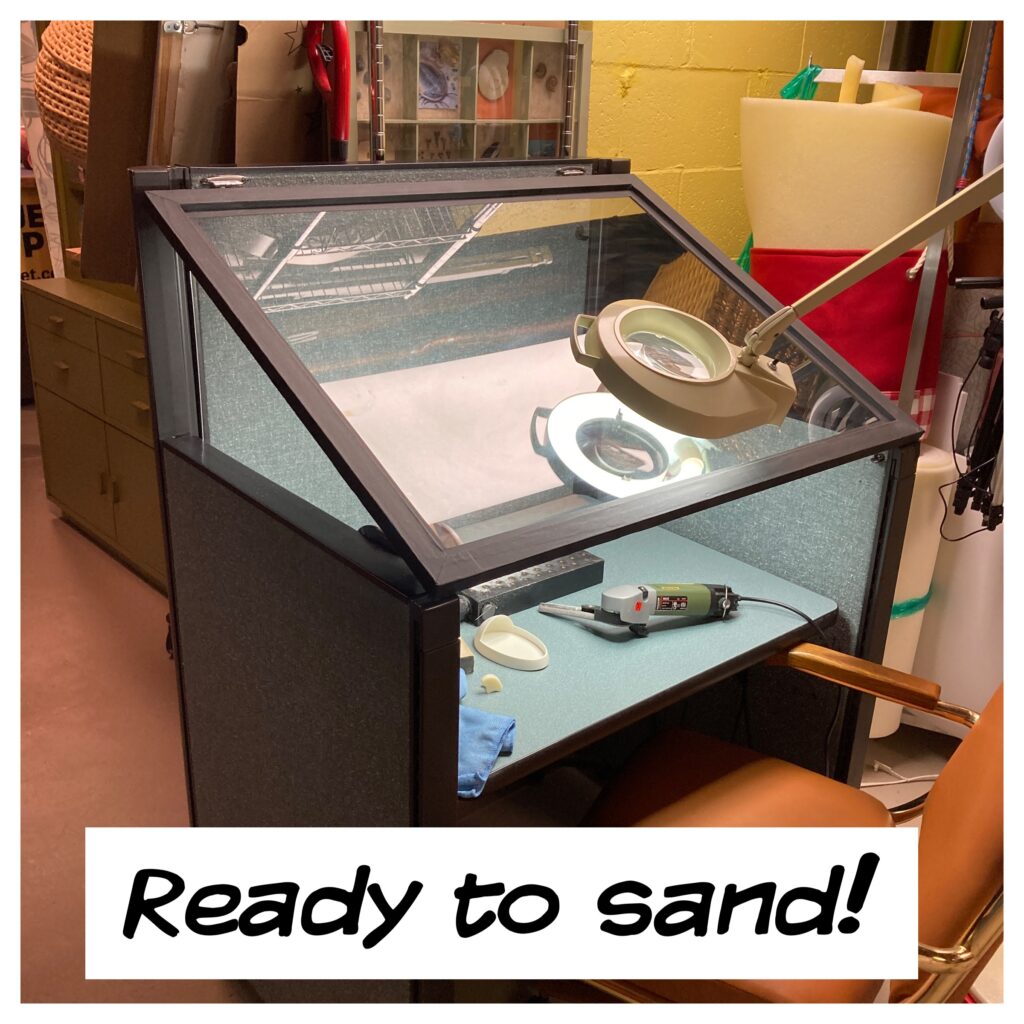
Seeing the progress of your sanding is important to get a good final finish. Good lighting and proper magnification help. My favorite magnification is my magnifying task light. I have one by my workbench for sewing and one by my sanding station. Alternately, a good pair of readers will help you see your work.
Refinement and Final Finish
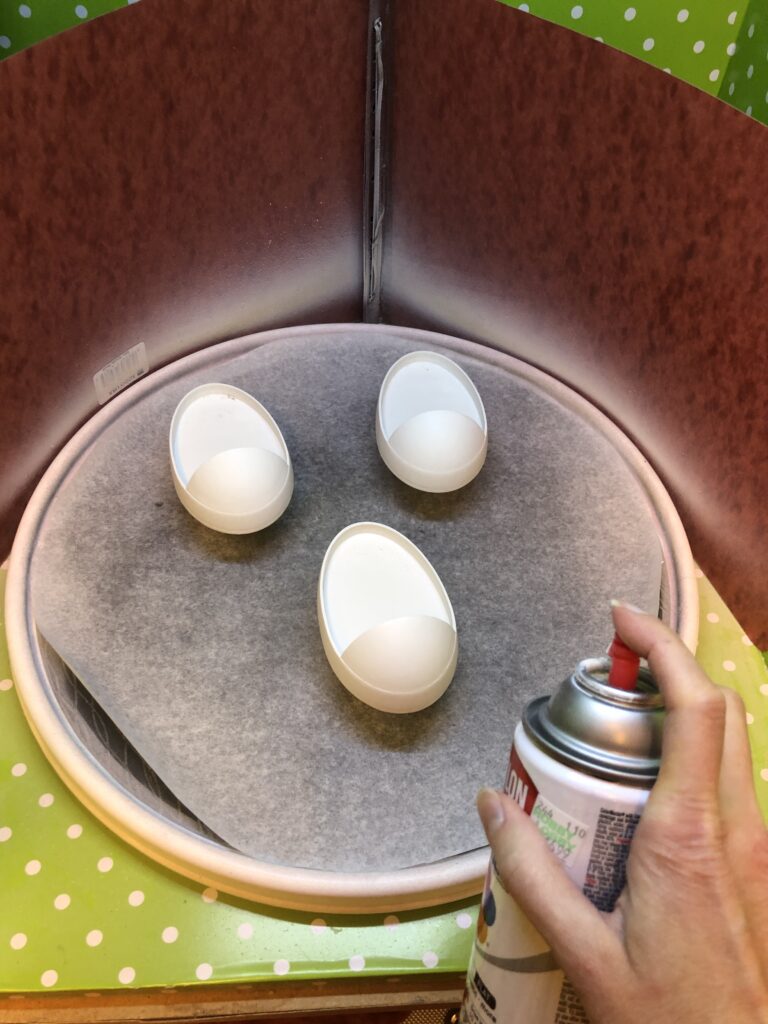
After I finish sanding my print smooth, I paint and seal it to create the desired matte or satin finish. This keeps the color stable and prevents soiling or damage over time. See my future article on painting and sealing 3D prints.
Final Notes on Sanding 3D Prints
If you are having poor results, check your filament type. If you printed in PLA, you may need to use a filler. This article is for ABS and ASA filament, which sands more easily.
What if you sand past the outer print layers into the infill? Seeing a void? Yep, you sanded too much. You can use a filler of some type to repair the void. In the future, avoid over-sanding. Alternately, you can print with a thicker perimeter wall by altering settings in your slicer software.
Safety, safety, safety! 3D printing is awesome, but you only have one set of lungs, so protect them while sanding.