Finishing 3D Prints
Finishing Steps for Professional Results
As much as I love 3D printing elements for puppets, the prints are not ready to use straight off the print bed. Layer lines show up on curved surfaces and require sanding. The sanded print benefits from some finishing with paint and sealant. Here are my favorite tools and products for finishing 3D prints.
Sanding Steps for 3D Prints
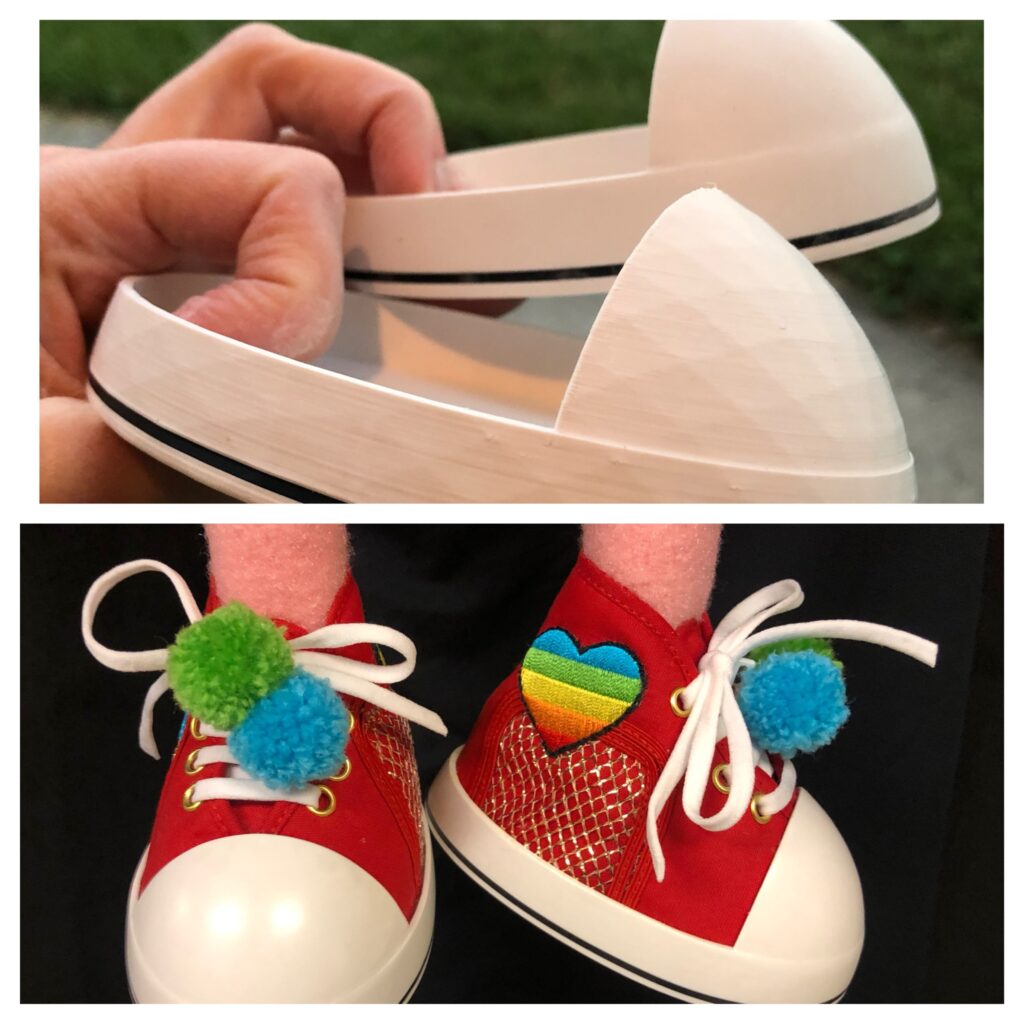
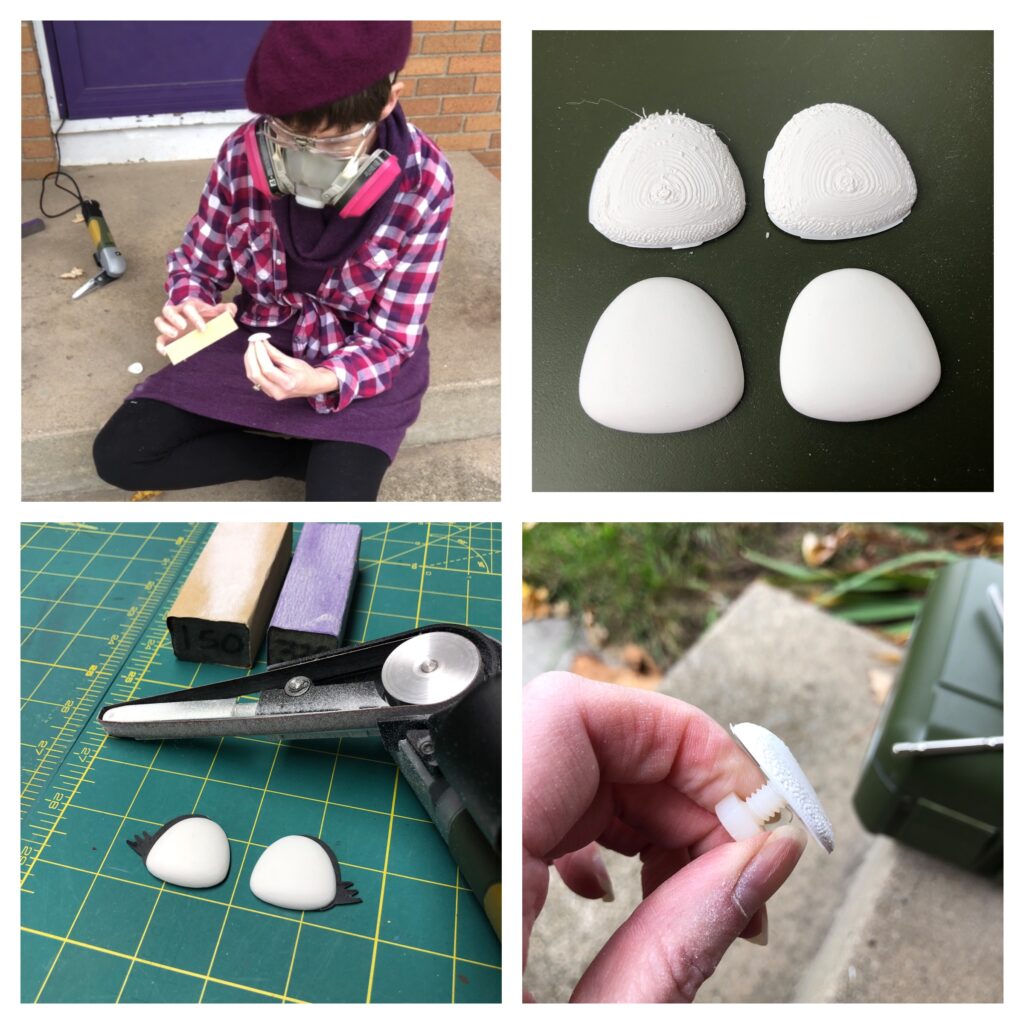
If the 3D print is an eye, I tap the back and add the hardware to create a handhold. This is helpful for both sanding and painting. Depending on the scale of the piece, I use either a power tool or a sanding sponges at various grits to knock down layer lines and create a smooth surface. See my blog post on sanding tools for more information on my favorite tools and a tutorial on how to make sanding sponges. My favorite grits range from 120-360 grit, although I do sometimes use a coarse grit like 80 grit briefly on the top to remove very coarse layer lines. To see the process clearly, I use magnification, either readers or a magnifying light. The same blog post on sanding tools illustrates my favorite light source with magnification. Start with the lower numbered coarser grits and move to the higher number finer grits of sandpaper or sponges until the surface is smooth under magnification.
Since sanding your prints will produce fine microplastics that can settle on your clothing, hands and even in your lungs, use a mask and glasses when sanding. Read my blog post here. My own lung issues created by inhaling plastic dust from sanding 3D prints spurs me to both warn you, and to also wear the protective gear I recommend.
Painting Your 3D Prints

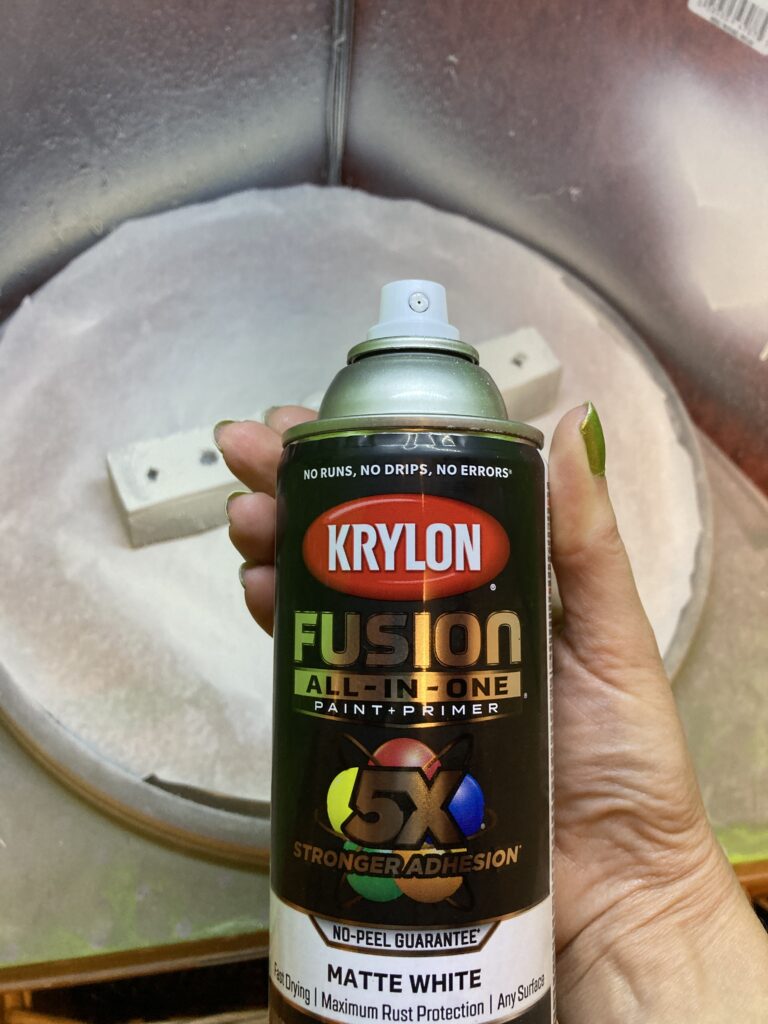
To create a consistent color and finish and prevent the yellowing of light colored plastics, I apply several coats of spray paint. I use matte or satin white spray paint. The Krylon brand Colormaster series dries in 10 minutes between coats, so I use Krylon Colormaster spray paint if it is available. Read the dry time on the back of the spray paint available in your area. A shorter dry time is convenient when doing multiple coats. If you are at the end of your project and the deadline is soon, the shorter dry time is crucial. If I wish to be cautious, I’ll make a duplicate set of eyes and other elements in case the paint job is marred due to dust or dripping. I do at least two coats, but more often three at the minimum. Check for stray fibers or drips between coats. To prevent dust from settling into drying paint, create an enclosure to shield your pieces as they are painted and dry. A quick, easy way to do this is with a cardboard box on its side. Before I built my ventilation cabinet, I used to have an old vintage suitcase that held my painting stands and props. I’d carry it outside on my driveway and prop it open. The item to be painted would be on a paper, piece of foam or old thread spool. I’d rotate the foam or paper beneath to coat all sides and then close the suitcase part way to shield the wet paint from falling leaves and outdoor debris. If you do get debris in your paint, wait for it to dry. Sand it smooth and repaint.
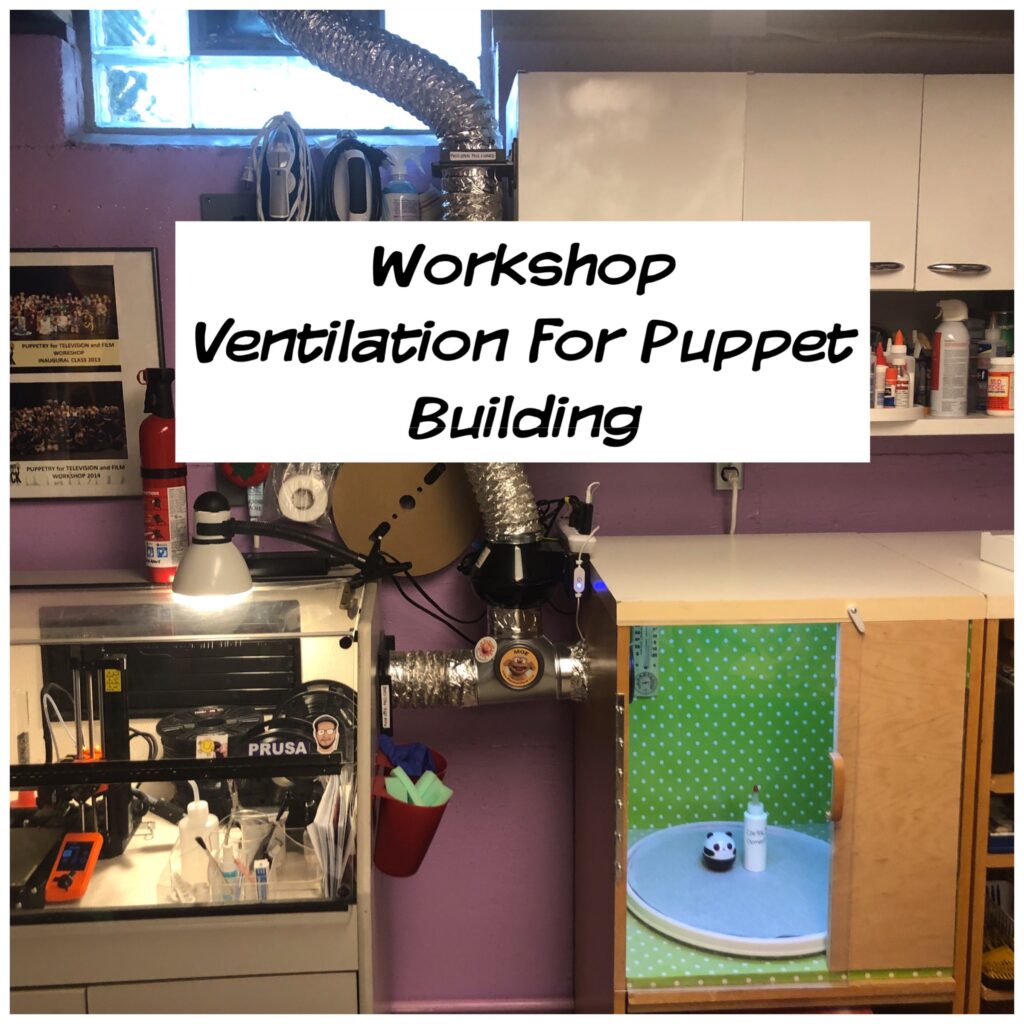
I can now paint inside my shop space in the ventilation cabinet I made. It pulls the overspray and propellant gas through a filter and to the outside through a window. I use an 18″ swivel stand (Lazy Susan) to rotate my objects as I paint to cover all sides and examine my work afterwards. The photo above shows two cabinets. My 3D printer cabinet is on the left. My painting and gluing cabinet is on the right. A 3-way duct connector joins the cabinets to an in-line greenhouse fan (black) that pulls the air from both cabinets outside. I use dust gates to control the air flow. Without the fan, my shop would be filled with nasty fumes from glue and paint. If you don’t have proper ventilation, then you need to paint outside. Michigan winters and better control over dust drove me to find this homemade indoor ventilation solution. I honestly couldn’t find a commercially available solution that perfectly fit my needs, so I created one using ideas and materials from woodworking dust control systems, dryer venting, and greenhouse air management systems. Once you can’t smell the nasty fumes, you know your system is working. I’ll write a blog in the future that details the materials I used to set this up.
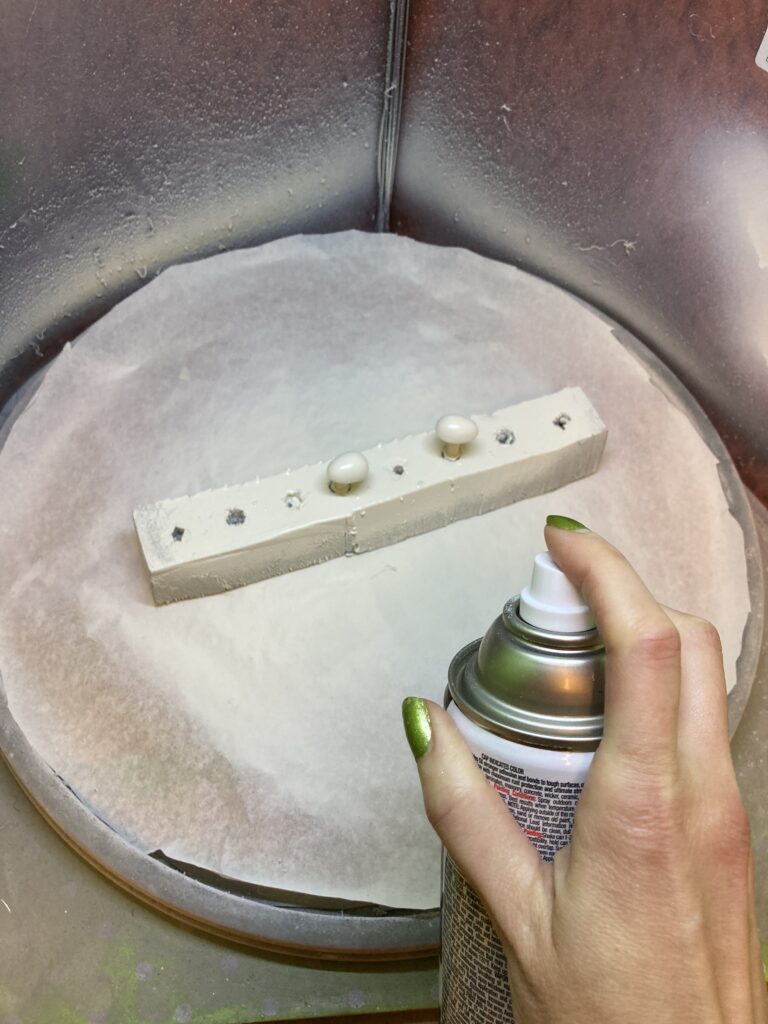
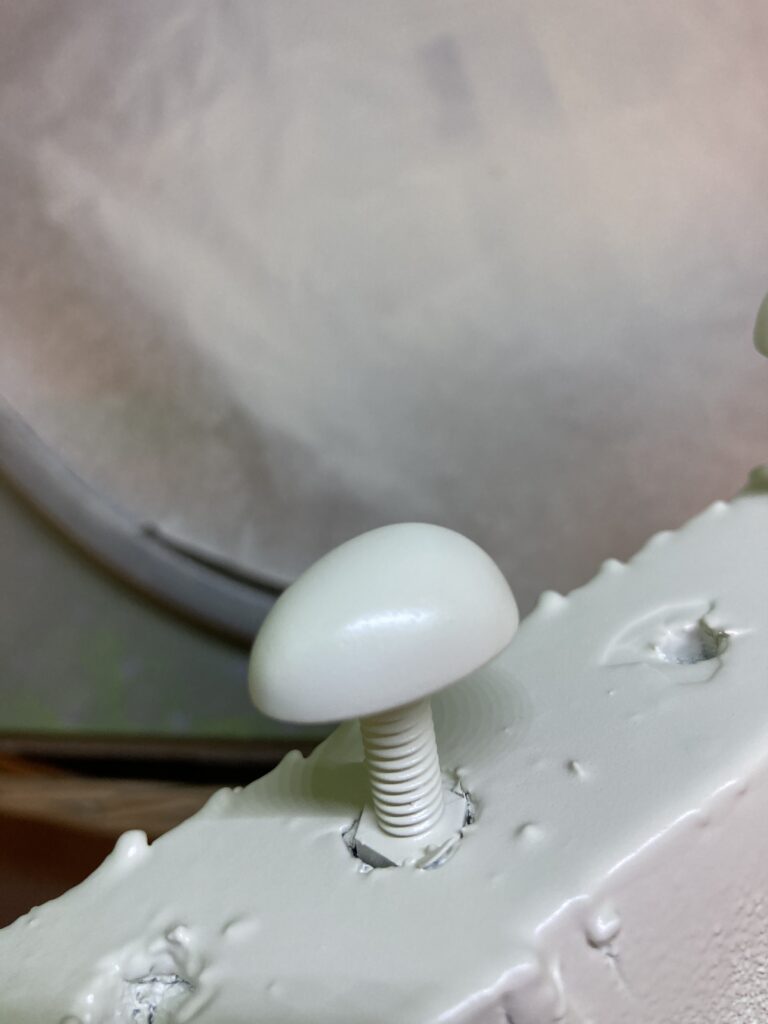
To paint, I use foam chunks or old thread spools to hold up my work away from the swivel stand surface (which I cover with paper). Eyes are held up on their nylon screws into a foam chunk. The small standoff allows me to paint the edges without them sticking to the surface below.
Sealing Your 3D Printed Piece
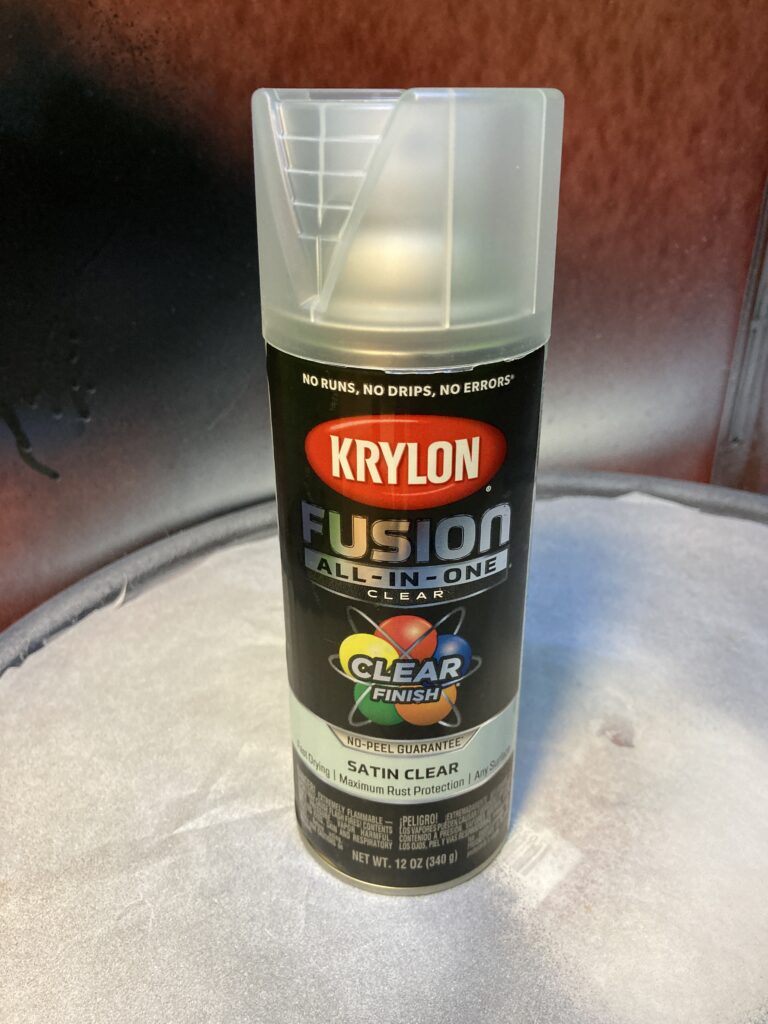
Do you have to seal it? I would. Once you drop the piece you worked hard to finish, you don’t want a scratch to mar its surface. Sealing will help protect it from scratching and marring over time. It also makes it easier to move or replace a velvet pupil without pulling the paint off. My favorite fast-drying satin clear sealant is hard to find now, so I have Krylon Fusion in my shop at the moment. This has a 20-minute dry time. When it comes to choosing matte, satin, or gloss finishes, here are the things I think about. I know that a gloss finish will reflect in a distracting way on camera, so I avoid it unless the eye is pure black and the sheen creates interest or “life” in a plain eye. I did a gloss eye on an alien recently because it added more life to the plain black. Otherwise, I aim for satin since it has less shine but prevents marring better than matte. Also, look for a formulation that doesn’t yellow over time.
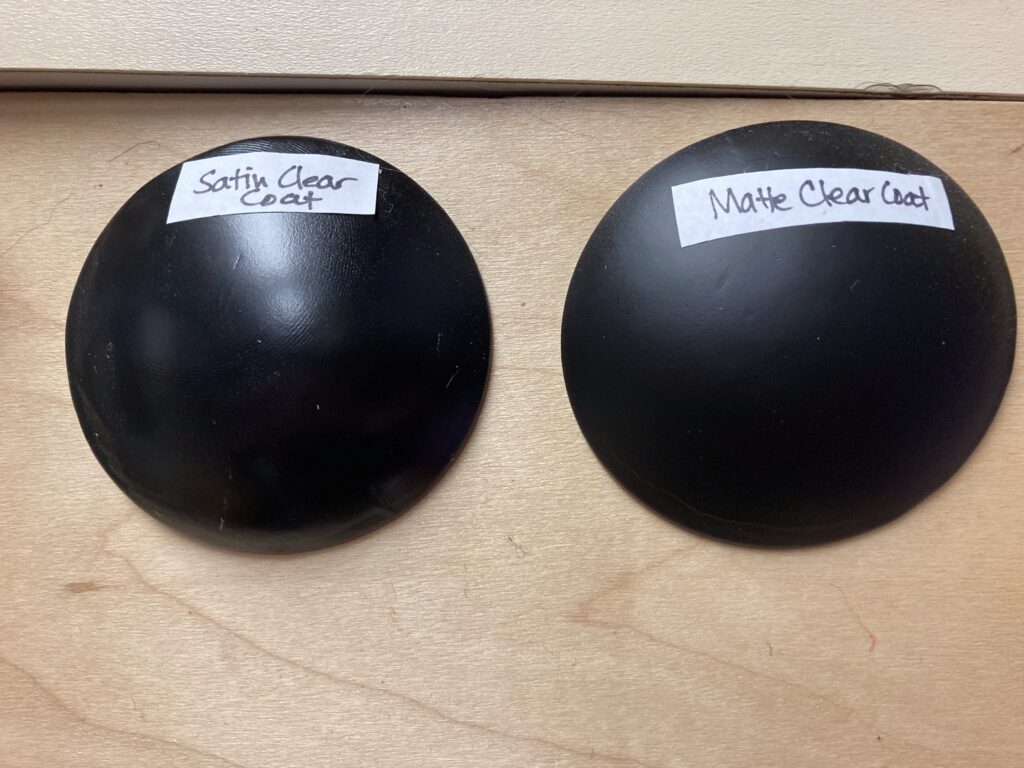
I have these samples mounted on my ventilation booth to remind me of the difference between matte and satin finishes, so I can make an informed choice.
Once you are finished with painting and sealing, give the paint job time to fully cure before adding to the puppet. As a general rule, I allow things to dry overnight before handling them fully.
Why the Fuss Over Finishing Details
Have you read this far and wondered why it’s worth going through this much trouble for some puppet eyeballs? If your goal is to make puppets that are viewed in close range because they are on HD television, then is level of detail is necessary to create the illusion that this character is real. If you can tell it’s 3D printed, it will read as a created object. If you can’t tell how it was made, you forget it’s created and believe it’s alive! If you are performing onstage and no one can see it closeup, then it’s not really important. Since I focus on puppets performed on camera, detail is key. 3D printing in particular means I can create puppets that are more original. It sets my work apart from others and allows my clients to request and receive the unique characters that they envision. The finishing details will set the professional builder apart from the amateur builder. What finishing detail would you love to master? What will set your work apart?