Effective Puppet Project Management Tips for Success
Planning to Prevent Burnout and Past Due
Burnout is real for me. It’s part of the creative process to waver between being inspired and discouraged. I now expect it to happen and am less surprised. I’ve learned to do the work despite a lack of inspiration. The book “The War of Art” speaks to developing a work habit. Steven Pressfield reminds us that showing up to do the work is part of being a professional versus an amateur. In terms of motivation, I do have a few tips. My post here https://www.lapuppets.com/when-you-hate-your-puppet-project/ talks about motivation. The post you are reading now is about planning on paper and calendar so you finish on time. Planning becomes more important as the projects get larger. Planning out the steps will help you finish by the due date. A visual or written reference lets you know how to pace your work to meet milestones within the project. It also helps balance multiple jobs. I rarely take on two clients at once. I avoid that generally, but I do have clients requesting multiple puppets or services.
Juggling Multiple Projects: Lists
Right now, I’m in the middle of a large-scale project. It includes 4 new puppets, 2 puppet repairs, and some accessories. The project needs to be completed in time for rehearsals and filming, so I can’t be late.
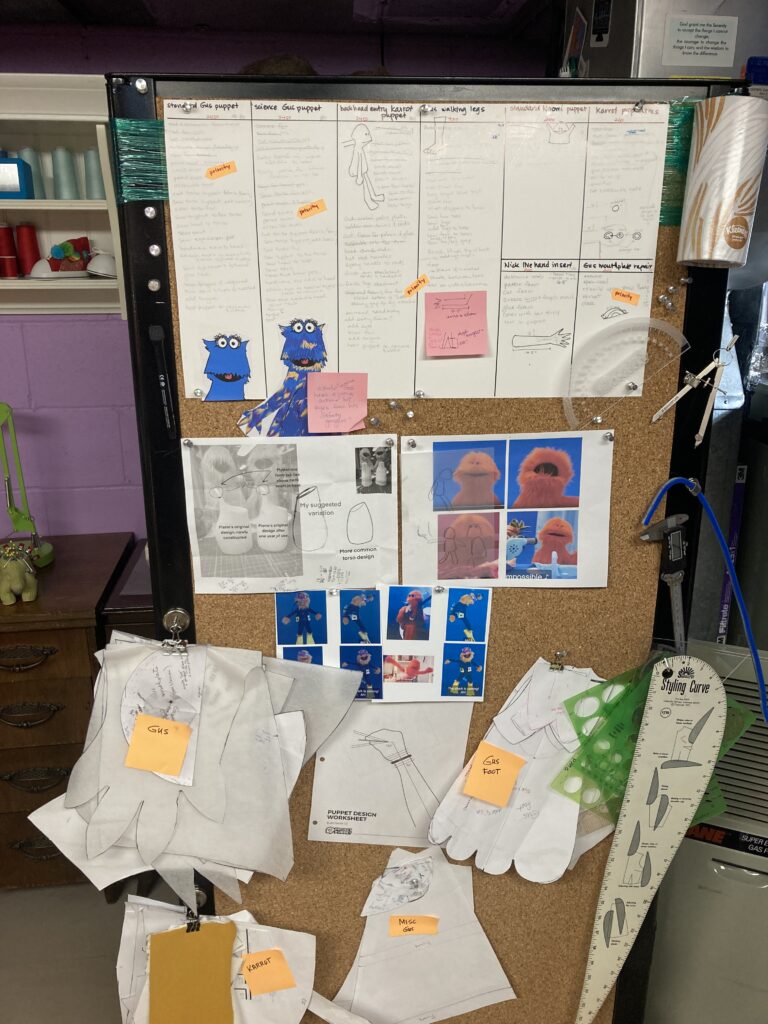
I knew this custom order was more than I usually juggle in 2.5 months. I’m a one-woman business, so planning would be key to completing it in time. After I video-conferenced with the client, I took my meeting notes. These notes outlined all the elements they requested in detail. I divided the requests into eight separate projects. Each project has a list of steps to complete. This helps me make a quote, send a 50% down invoice, and create a “to-do list”. I hung my to-do list on my project cork board near my work table. Sticky note arrows show where I am on each list, and project bins hold materials for each project. My cork board holds reference photos and pattern pieces as well.
Juggling Multiple Projects: My Magnetic Quarterly Calendar
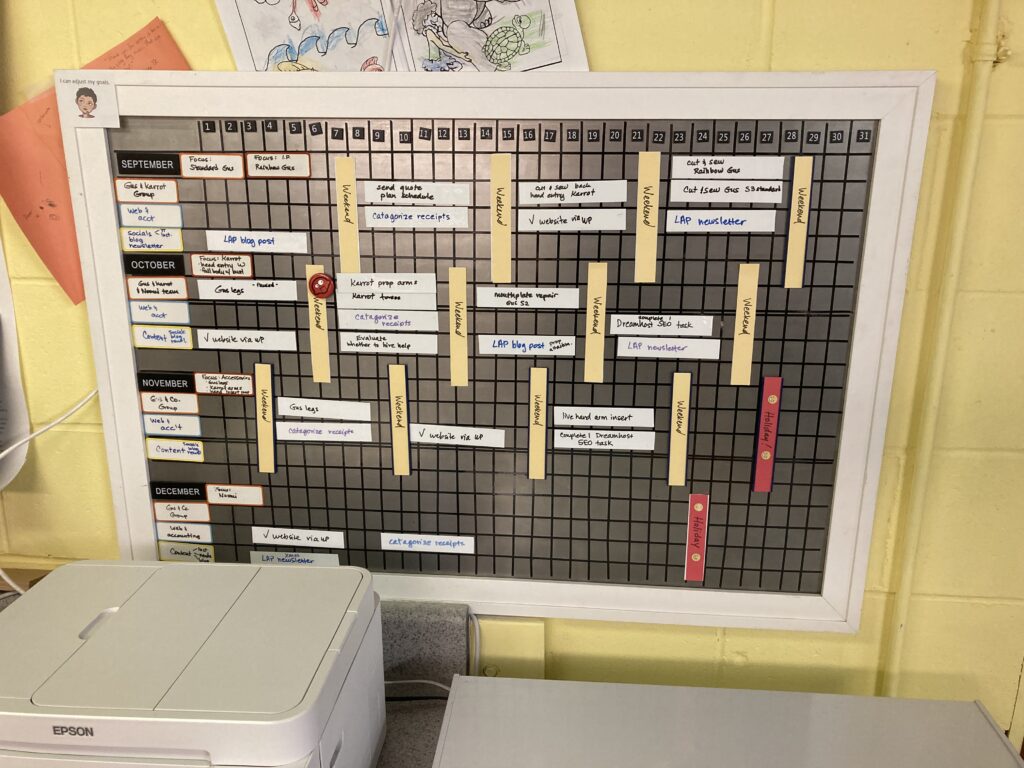
There are some cool digital project management tools. Monday.com is my favorite. As a solo puppet builder, it’s overkill. Plain paper and a calendar is best for me. In terms of a wall calendar, I have a homemade magnetic quarterly planning calendar. It gives me a bird’s eye view of 3 months so I can plot projects and goals in doable chunks.
How To Make Your Own Magnetic Calendar
My magnetic calendar is made from a picture frame with a piece of sheet metal replacing the art and glass. To create the grid for the days of the month, I taped off the sheet metal into a grid. Thirty-one spaces in each row represent the days in a month. I used this thin graphic tape. https://www.amazon.com/gp/product/B07B9VDMJD/ref=ppx_yo_dt_b_search_asin_title?ie=UTF8&psc=1
I bought labeled magnets for months and days https://www.amazon.com/gp/product/B09PH1MLBF/ref=ppx_yo_dt_b_search_asin_title?ie=UTF8&th=1 as well as dry erase magnet rolls to add tasks with a dry erase marker. https://www.amazon.com/gp/product/B08Q7Z99XZ/ref=ppx_yo_dt_b_search_asin_title?ie=UTF8&th=1 My project categories listed on the left margin use these magnets. https://www.amazon.com/gp/product/B0983VRBTD/ref=ppx_yo_dt_b_search_asin_title?ie=UTF8&th=1
My sheet metal is 24″ tall by 36″ wide in case you are curious. I looked for the largest frame I could find secondhand and planned around what I found. I marked off my weekends with yellow divider magnets, so I could assign tasks for each week.
The Benefits of a Magnet Board
I chose a magnet-based task calendar because I found it discouraging to erase tasks on a paper planner. Now when I’m behind schedule or when I need to shift tasks while awaiting supplies I shift the magnets. I can lift and slide the task to a new week. I can also easily alter the wording on my task strips because they are dry-erase. This timeline also makes it easy to see if I’m slipping behind. If tasks build up too deep in one week, they won’t fit on the board. This is my cue to increase my work hours. I may also drop or delay less important tasks. Sometimes, I need to warn the client about potential delays. I also plan when to tackle social media posting, blogging, accounting, writing my newsletter, and website maintenance. I can space those tasks out over the month, so my workload is more balanced. Did you know I have a newsletter? Sign up at the bottom of my homepage https://www.lapuppets.com and get free design templates!
Weekly Planner: Blocking out time to build
The magnetic quarterly calendar helps me remember my tasks. Written task lists remind me to block out time on my weekly planner for specific tasks. I add my non-puppet standing appointments to my planner and then block out 1-2 hour blocks for building. Seeing how full my week is helps me say “no” to other potential disruptions or commitments. As I type here, my weekly schedule indicates I should work on a mouthplate hand grip. I needed to change pace, so I swapped tasks. I give myself grace and shift tasks to avoid burnout. Self-employment has its perks. I keep an eye on the overall project pace to stay on track for my deadline.

Yes, I’m detail person. I’ve designed my own planner.
Lots of artists aren’t detail people. I’m a detail person. I like the details on my puppets to be well executed and I like detailed plans. I like to plan. That’s why I’ve developed a goals planner for independent artists who are trying to start a business. The planner is one other tool you don’t see here. It helps me think through my goals and vision for Live Action Puppets on a yearly and quarterly basis. It tracks build hours to help in future quoting. It has prompts and planning tools for social media management. Having an overall vision helps me to say “no” to projects. Some projects don’t align with my vision for my business or leave time for personal goals. Knowing what other non-building tasks attached to my business helps me make space for those tasks as well. Over time, I’ve learned how much I can tackle in any given week. That knowledge helps me to refine my goals. I adjust my expectations so the pace is manageable. This leaves time for a life outside of “work”.
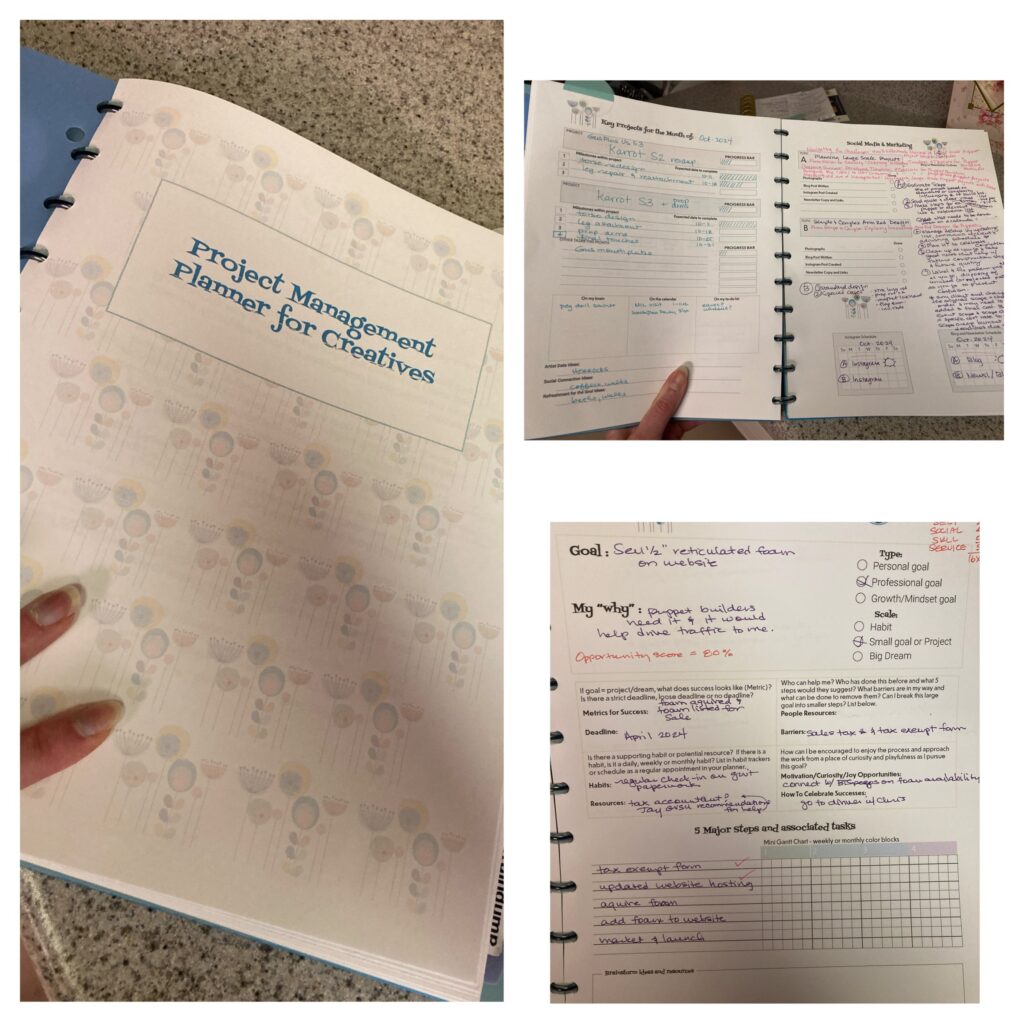
A Hot Tip for Custom Planner Designers
In the off chance you like the idea of making your own planner, I’ll give you a hot tip. The arc or disc-bound format used in Happy Planners makes it easy to beta test and change your design. If you print on 28lb paper, you can remove and add pages. Thicker paper is firmer than standard printer paper, plus your pens won’t bleed through. I have four different planners I’ve designed and used for myself. Three are half-page format (junior), and one is letter size. TUL brand and a few other brands carry these two sizes of disc-bound notebooks with plain paper inserts. The Happy Planner is an odd paper size and a pain to format and cut. Avoid designing your planner pages to that page format. It creates waste and costs more in time and money. Google “disc bound notebook” to find options. Check sizing to see if it easily conforms to letter or half-letter size paper.
Questions?
Questions or comments? Email me at pam@lapuppets.com .