Homemade Downdraft Sanding Station for Sanding 3D Prints
Build Your Own Homemade Downdraft Sanding Station to Protect Your Lungs
Between toxic contact cement, spray paints, and plastic dust, my puppet-building process is rife with ways to injure myself. I’ve learned from my mistakes and have a few ideas for making your shop safer. Plastic dust can irritate my lungs in minutes if I’m using a power tool. The dust goes airborne fast. I’ve tried a variety of masks and shields. My current setup is my safest. I’ll share my unique design. You may need to change the design depending on what you have available.
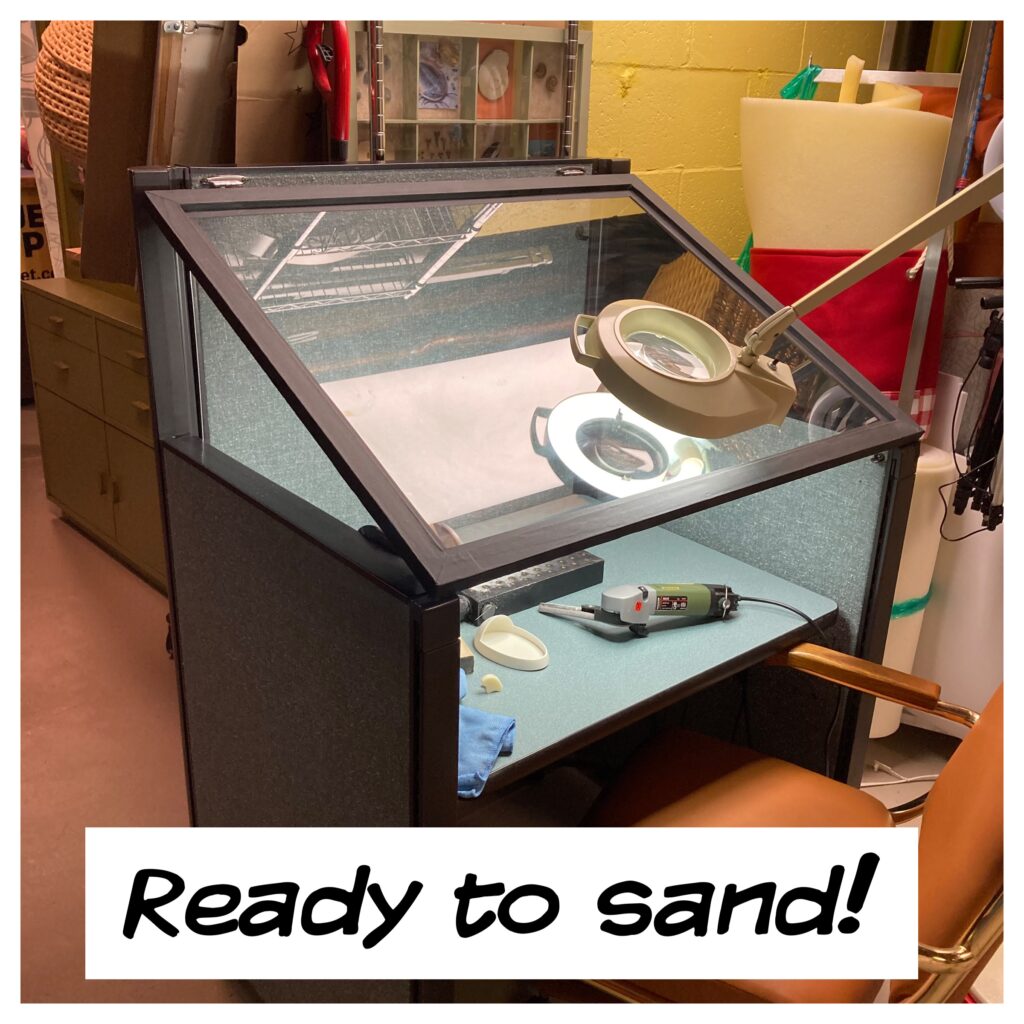
Enclosure with Glass Top & Downdraft Box
The general idea is to pull the dust away from your face. Depending on your power tool, dust can inadvertently spray directly towards your face. The down draft box combined with a glass shield means suction pulls the dust down and into the vacuum. The shield stops any other dust not captured from getting into your nose and mouth. I also go one step further and wear a full respirator mask with cartridges. I’ve gotten lung irritation so many times requiring steroids that my lungs are more susceptible, so I take extra precautions. I took inspiration for my design from downdraft tables used by professionals working with steel and wood. I also took inspiration from the sanding stations used by dental professionals making custom mouth guards. My other ventilation cabinet for paint takes inspiration from hobbyist paint spray booths and woodworking dust collector systems. I’ll write a future blog post on how I designed my spray paint and toxic glue ventilation booth. It uses an inline greenhouse fan to pull fumes and paint overspray out of the house using dryer ducting. The same fan pulls fumes from my 3D printer booth outside. I couldn’t use that same booth for sanding because the particulate from sanding would get into my painting.
Finding and Creating the Enclosure
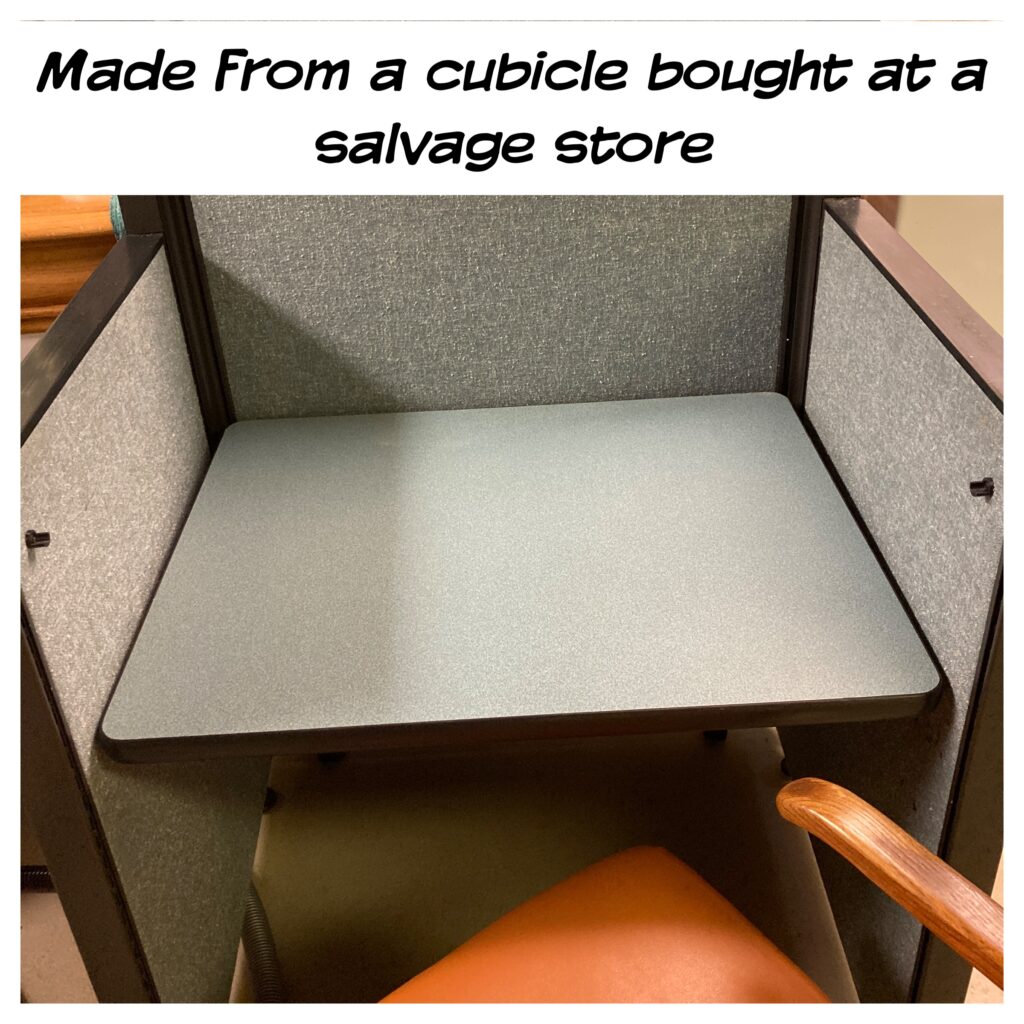
To create an enclosure, I kept my eyes peeled for a used item that would create an enclosure. I found a small second-hand office cubicle at a second-hand/charity shop. My design evolved to work around that. The cubicle had three walls. These walls would help contain the dust. It was also cheap, maybe $30.
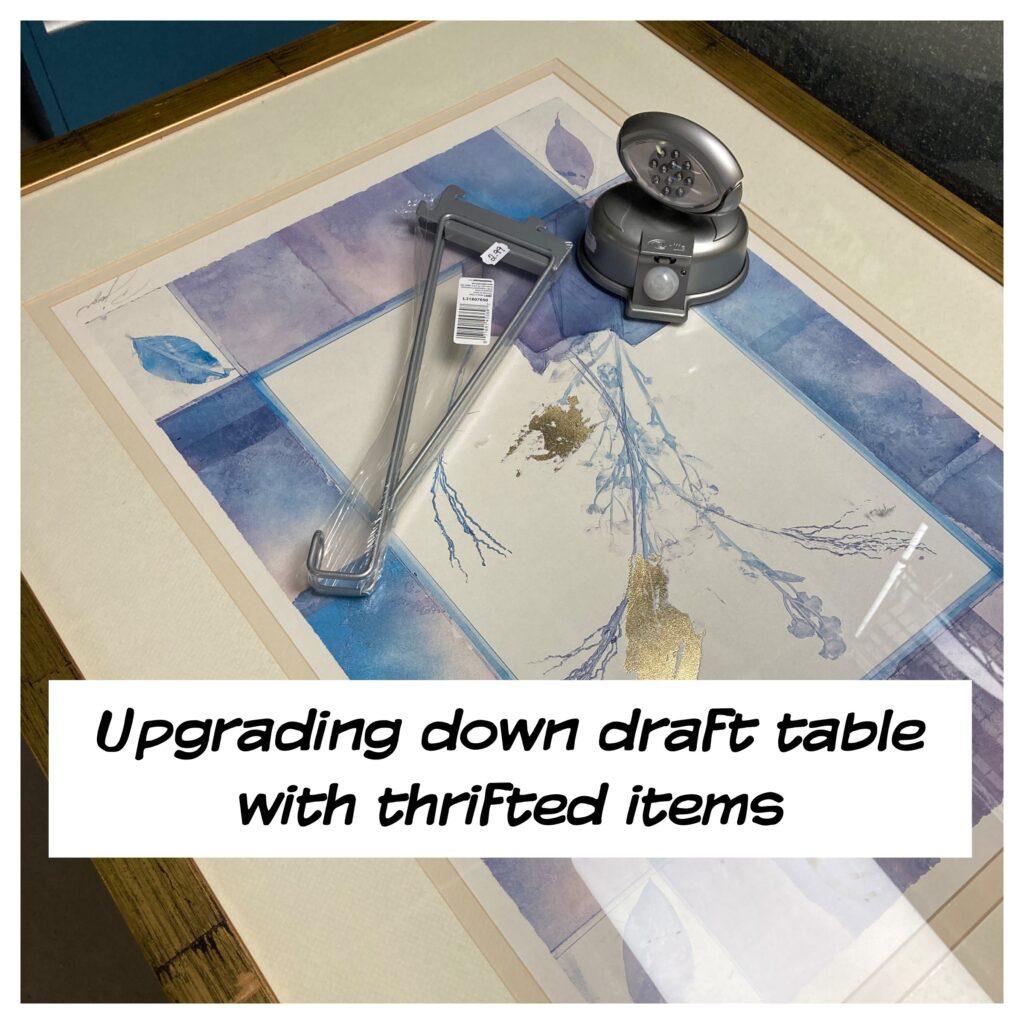
The Face Shield
I wanted a face shield to stop plastic dust that wasn’t pulled into the downdraft system. My first attempt was clear tablecloth vinyl hung on rods. There was too much glare with my overhead lighting.
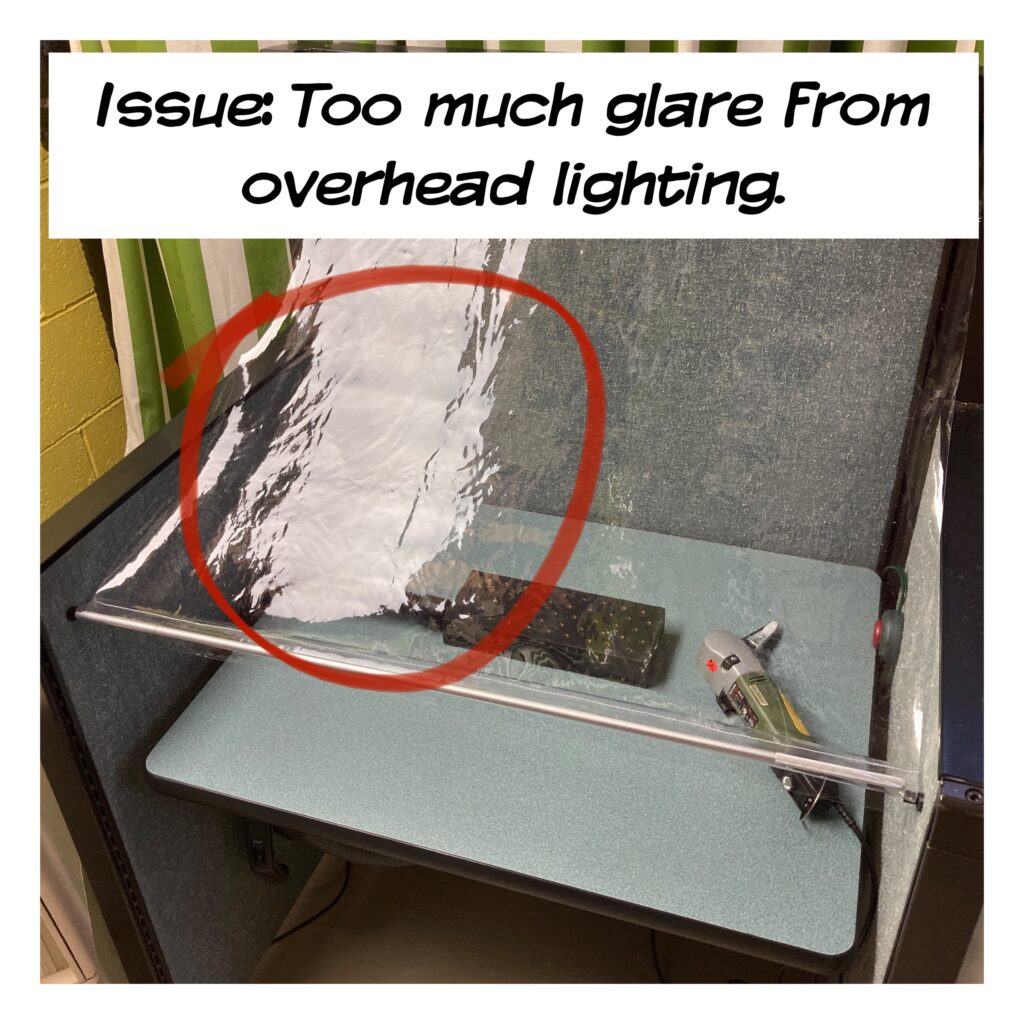
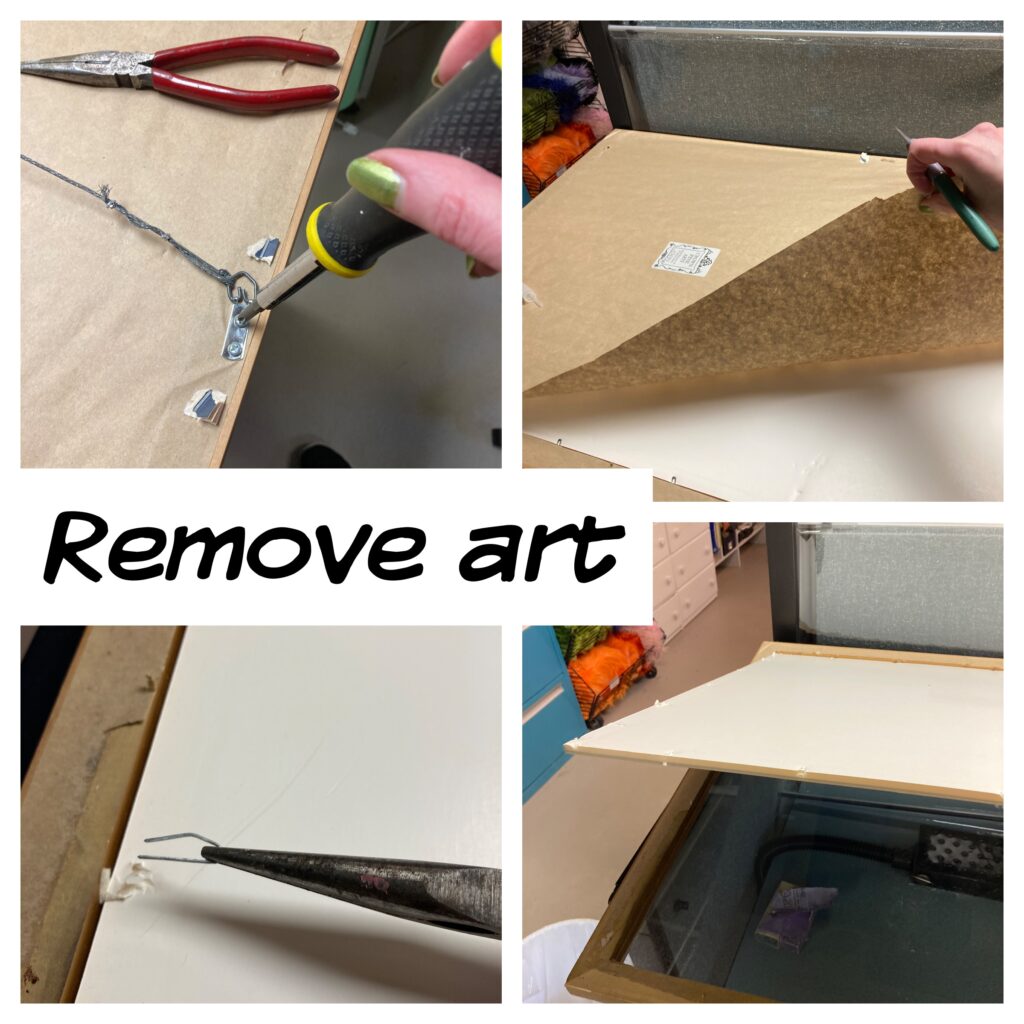
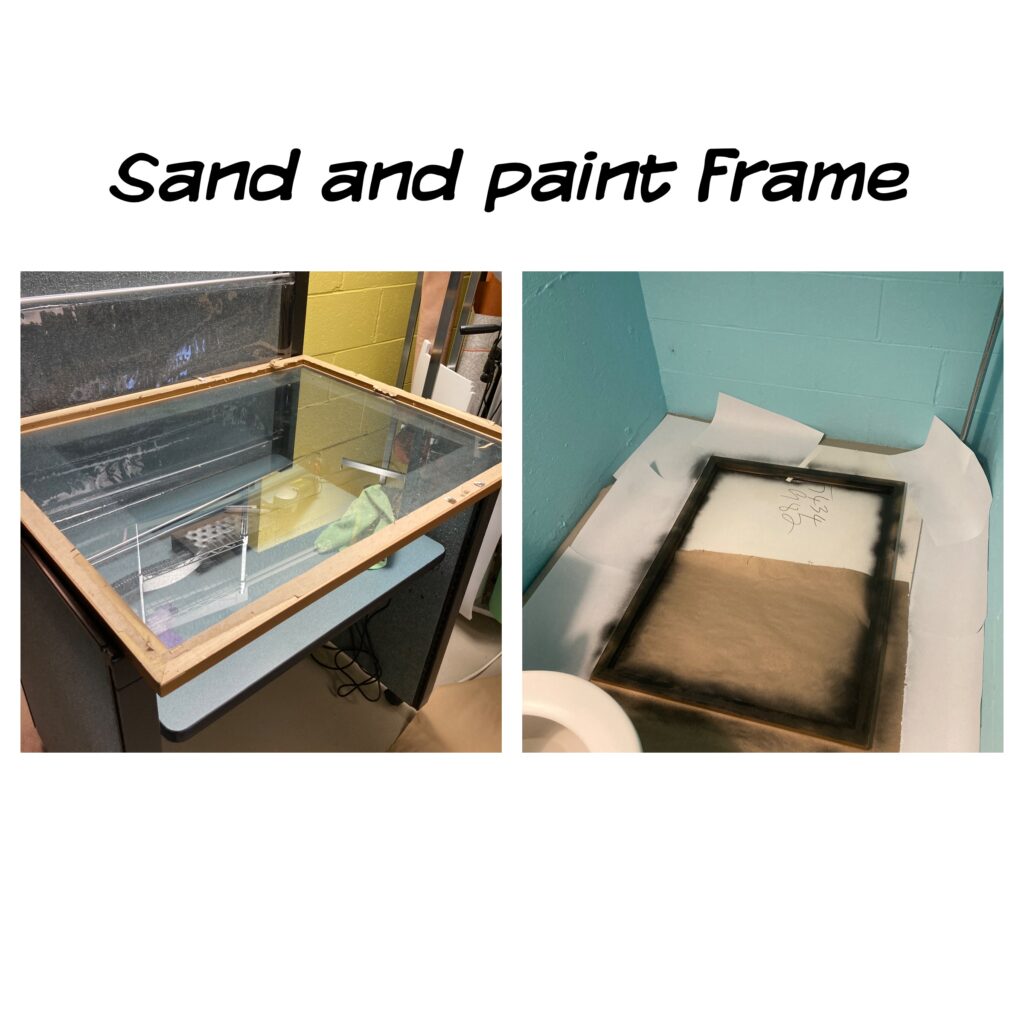
My second attempt was glass tilted at an angle that avoided glare. I knew the glass needed framing. The cheapest way to do that was to use a picture frame, preferably “used” to reduce cost. I measured the cubicle and hit the thrift store to find a frame that would work. I found it! I pulled the artwork apart, discarded the actual art, and finished the frame in black to match the cubicle/booth. Self adhesive foam pads cushion the glass within the frame which is facing wrong side up.
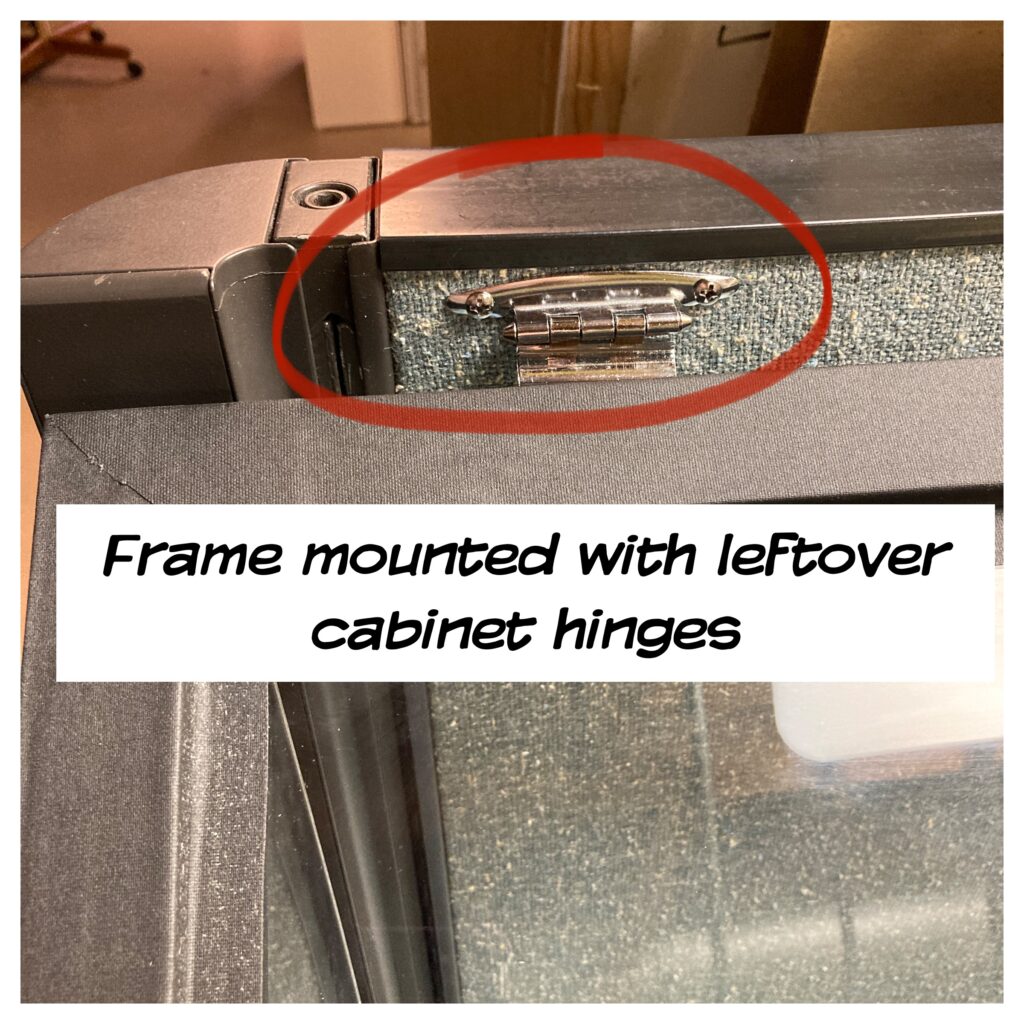
Mounting the Face Shield and Finishing the Edges and Sides
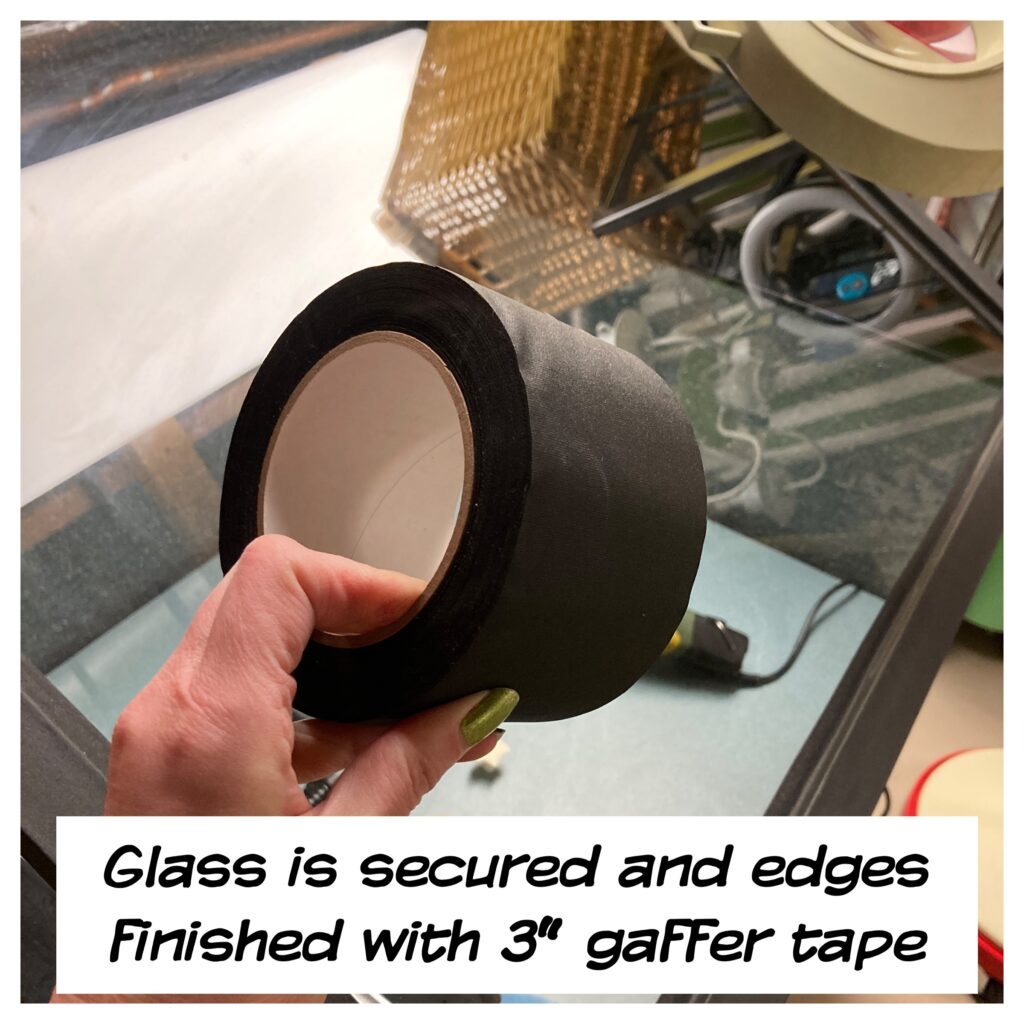
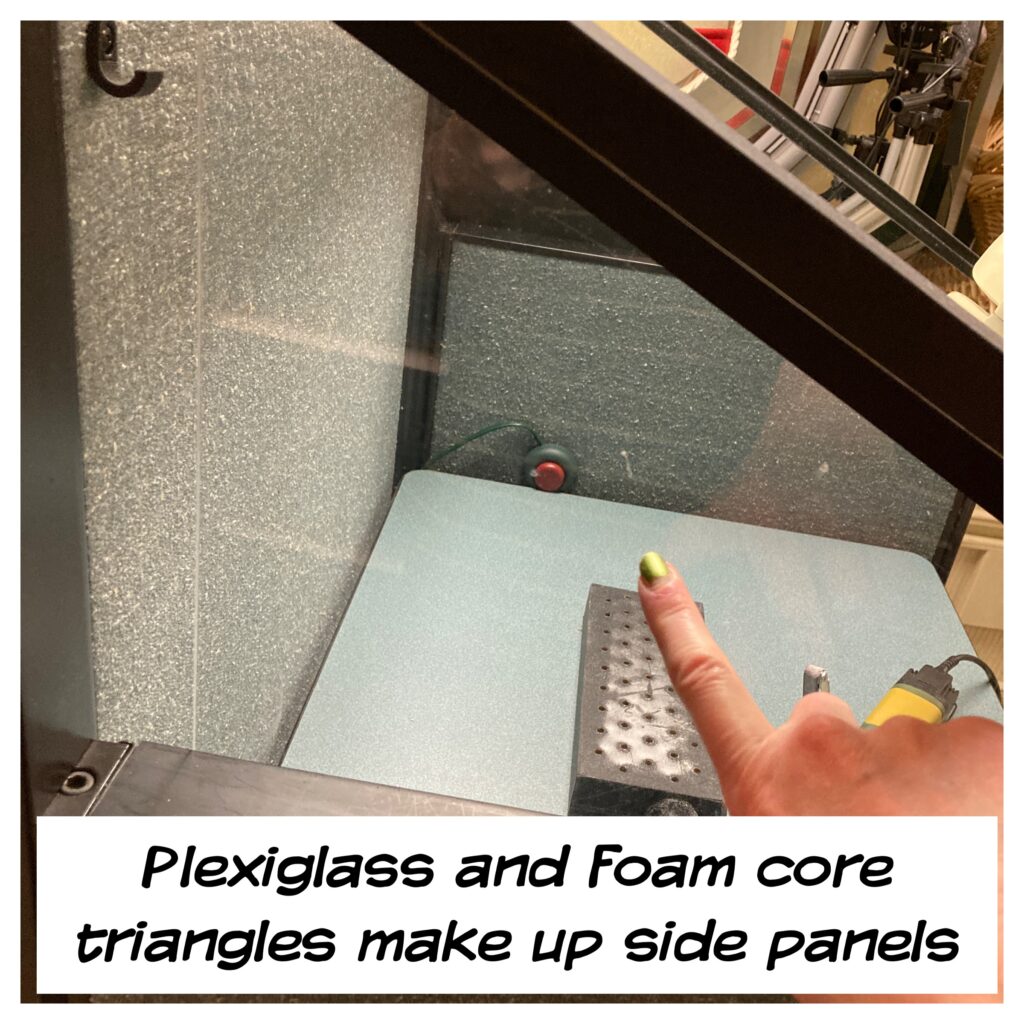
I used leftover kitchen cabinet hinges to mount the frame to the cubicle on the upper edges. I can now open the sanding booth for cleaning if needed. I further secured the glass within the frame on the backside with 3″ black gaffer tape. The open triangular sides are fitted with leftover plexiglass on the side that can omit light. The other side is enclosed with black foam core.
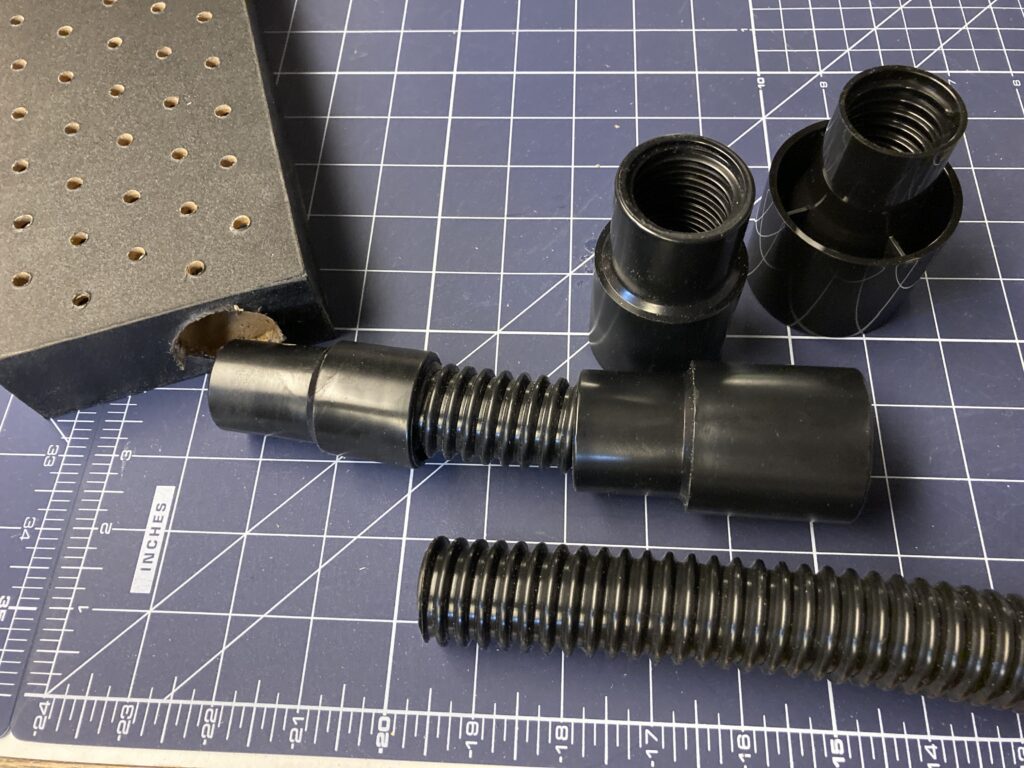
Creating the Downdraft Box
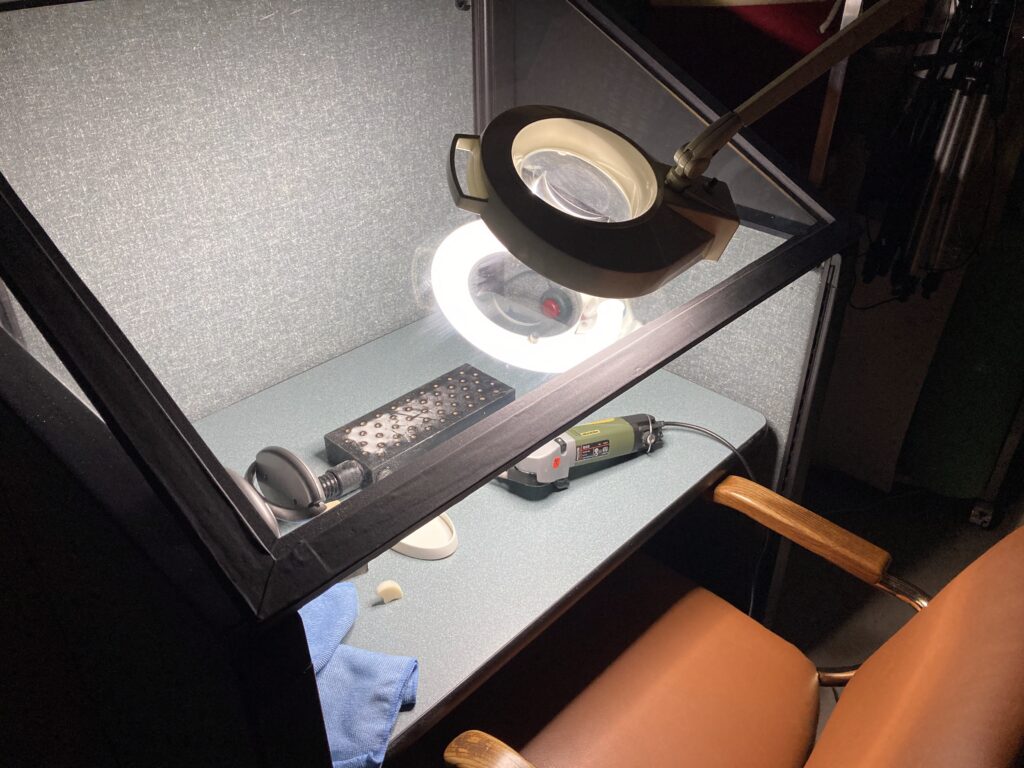
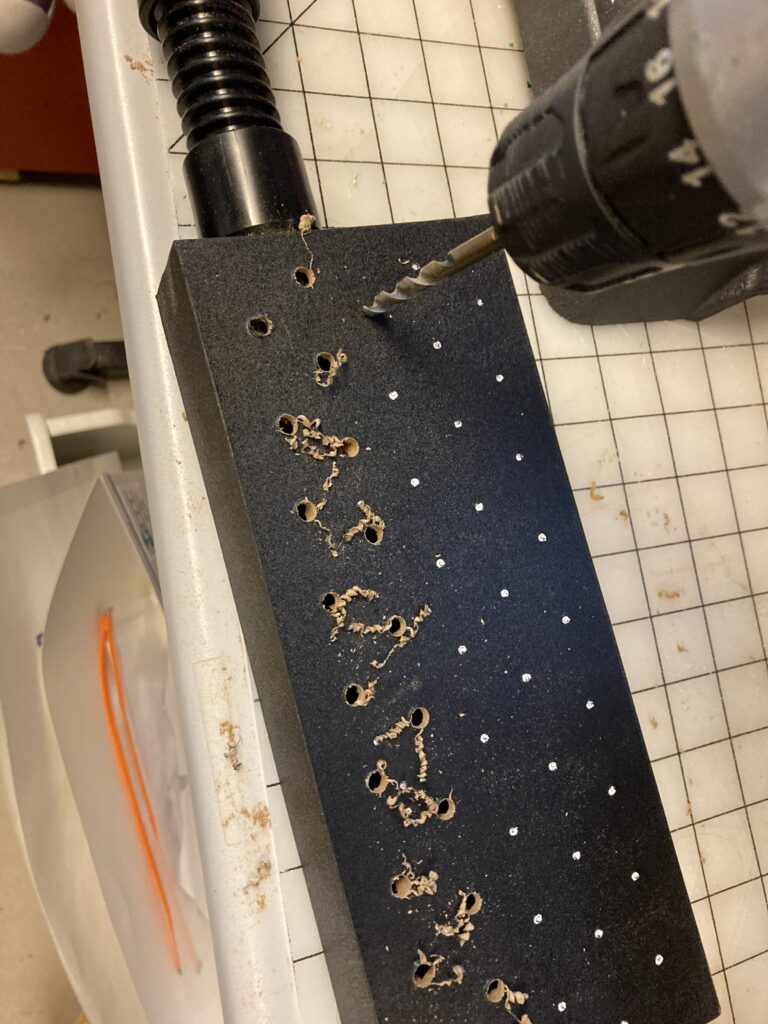
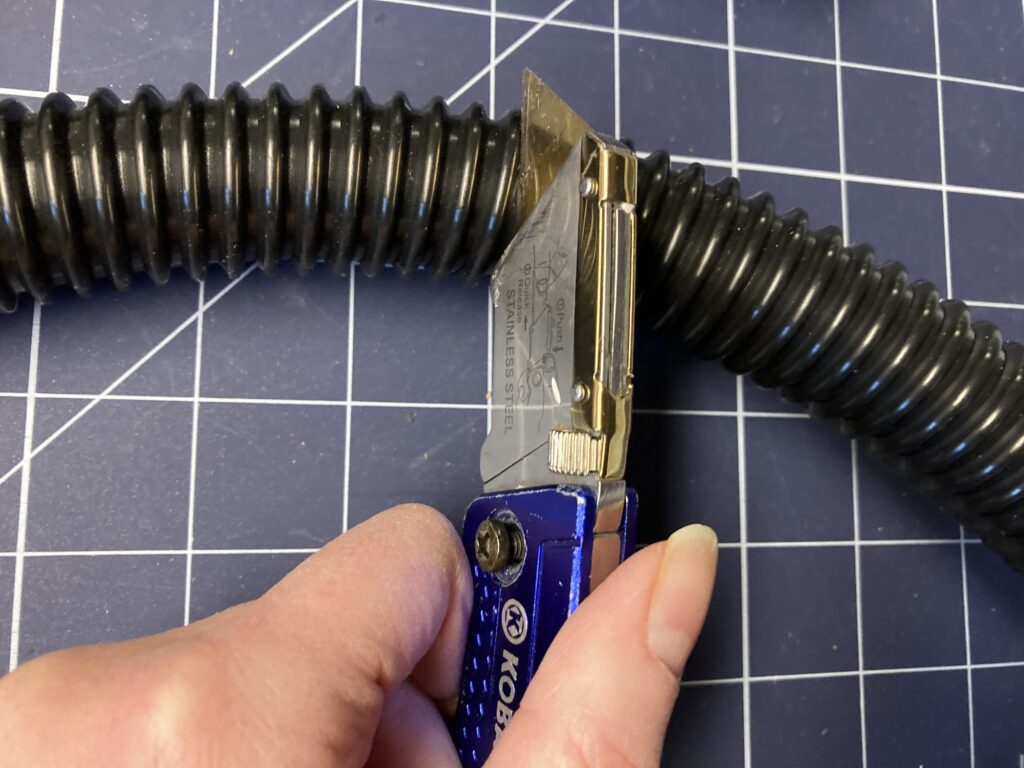
I knew I wanted to use a standard home or shop vac to draw the air into my downdraft box. I sourced some hose adapter parts on Amazon that would fit my home vacuum. I tried different setups and tested them. The box needed to draw enough air to remove dust coming directly off my sanding tool. The best solution was a hollow box I had on hand. A chocolate box or a shipping box that is just tall enough to admit the hose end would also work. If the box is too large, you’ll not get good suction at the far ends. Smaller is better. I drilled small holes in my box top. I drilled a large hole in the side to fit the vacuum adapter and hose. One adapter end fit into my box and another adapter end drops below the table to attach to my vacuum.
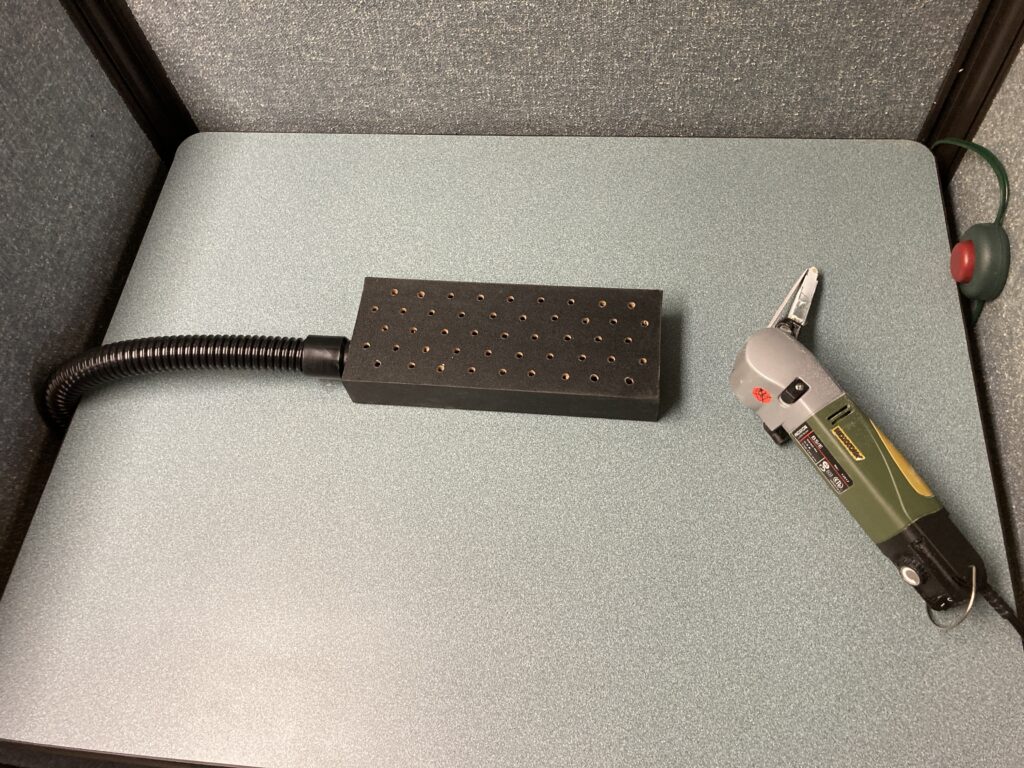
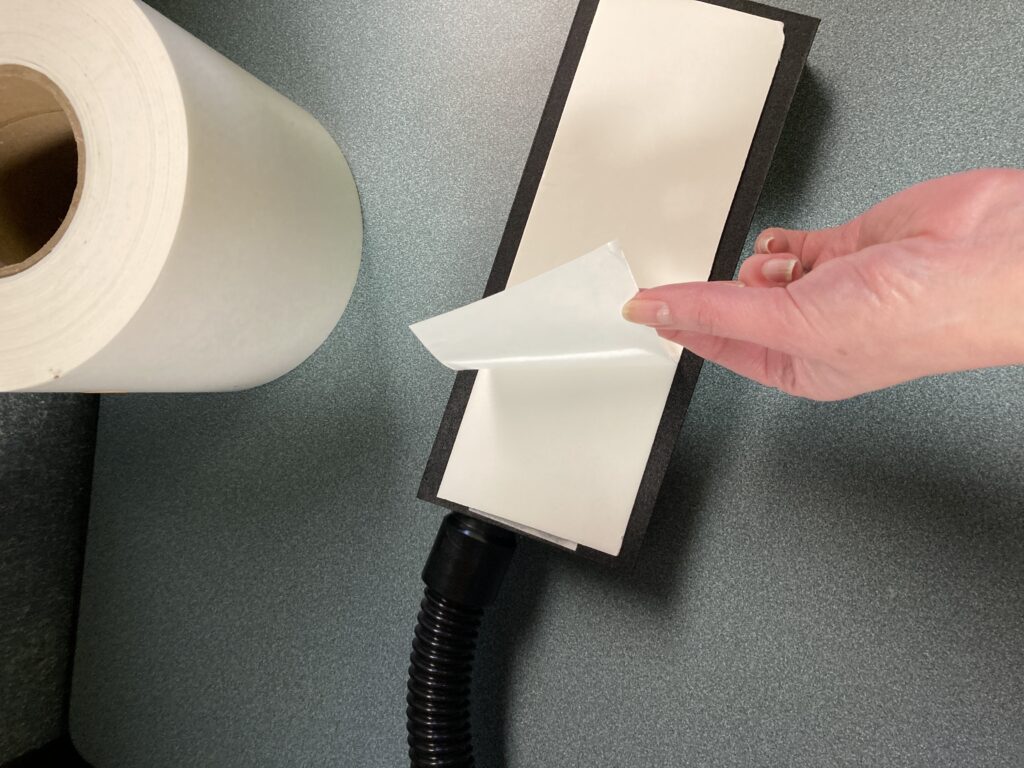
I used double-stick foam tape to mount the box to the cubicle work surface. Before sanding, I turn my vacuum on to get the airflow going. I start sanding with my face above the glass shield. For more protection, I often wear a respirator and my headphones playing music or an audiobook. The headphones block out noise and distract me from the discomfort of the respirator.
Lighting and Magnification

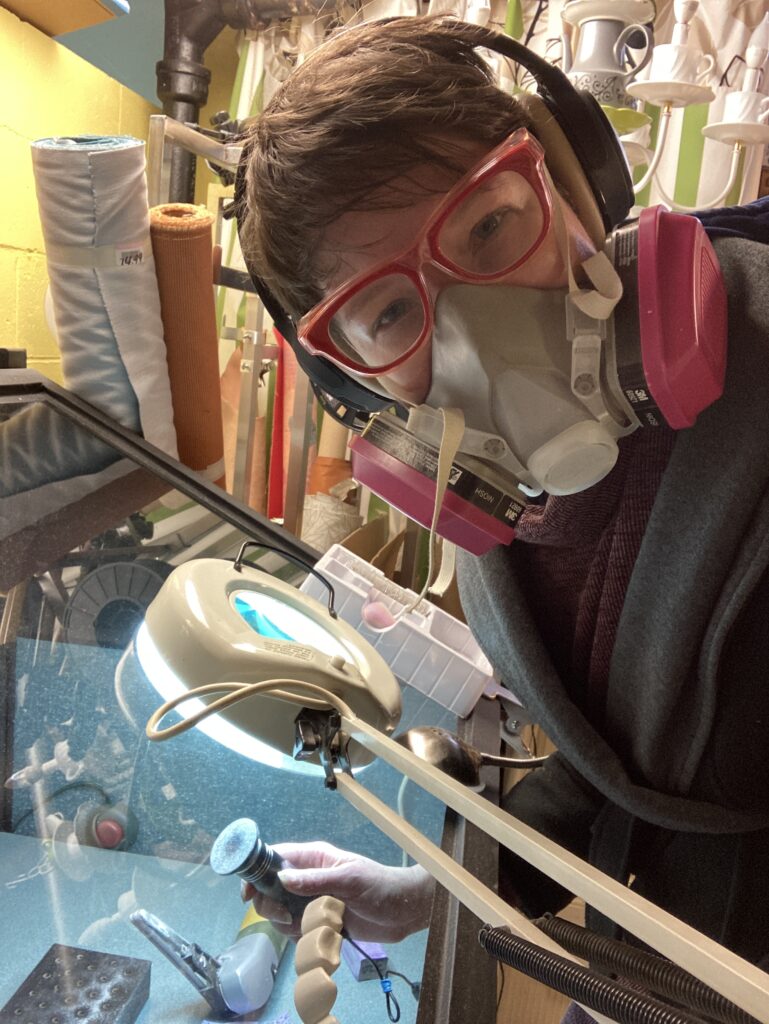
I’ve tried several sources for lighting and magnification. My favorite is a magnifying light resting on top of the glass face shield. The proximity reduces glare, and the magnification is in the right spot to detail sand. I love this combo of magnification with built-in task light A LOT. I have one near my work bench for detailed hand sewing, and one at my sanding station. The one near my workbench is super heavy. I suspect it was originally used in a dental office many years ago. I put it on a beer keg dolly, so I can move it around the shop.
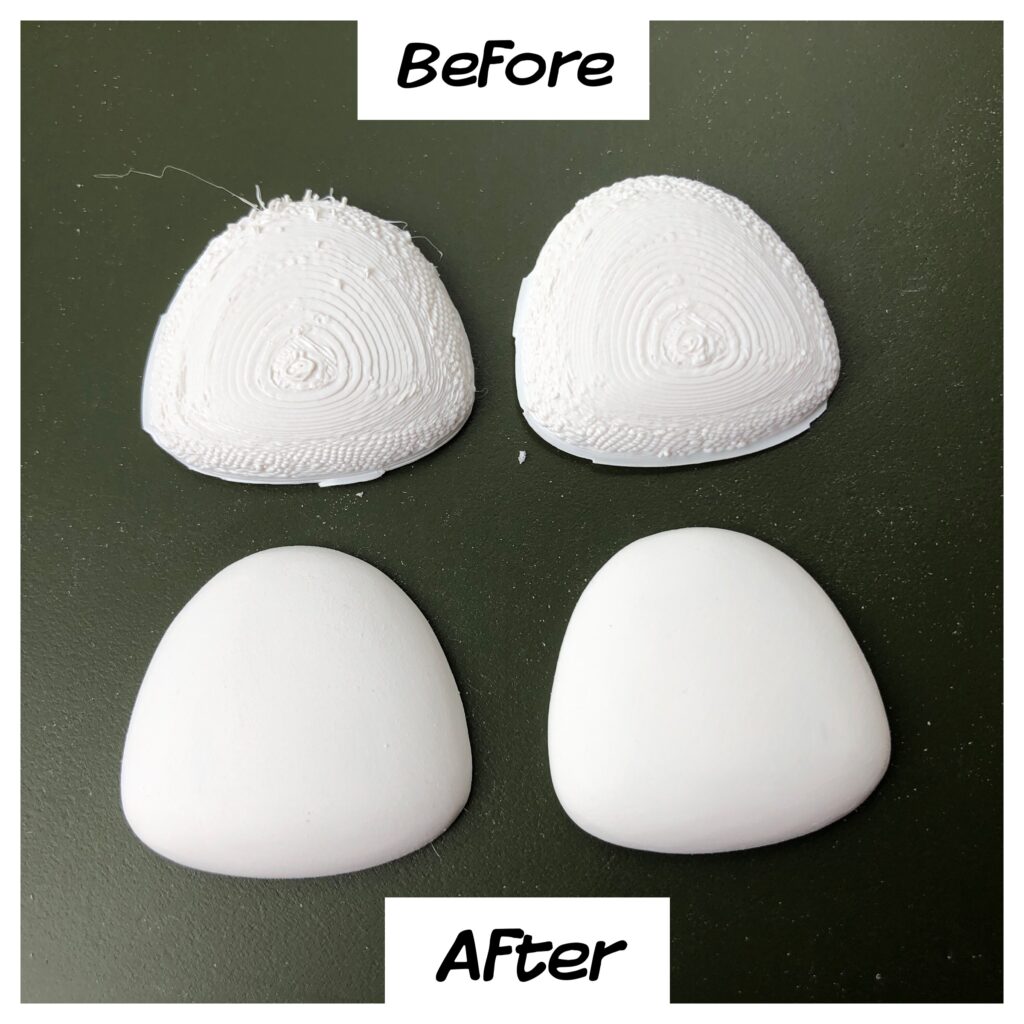
For suggestions for sanding tools for finishing 3D prints, I’ll write a future blog post. I have homemade sanding sponges that I use near my workbench. The power sanding tools live in or hang from my sanding station. There are several great options at various price points to suit any budget.