Basement Storage Solutions: Maximize Rafter Space
Creating Basement Rafter Storage
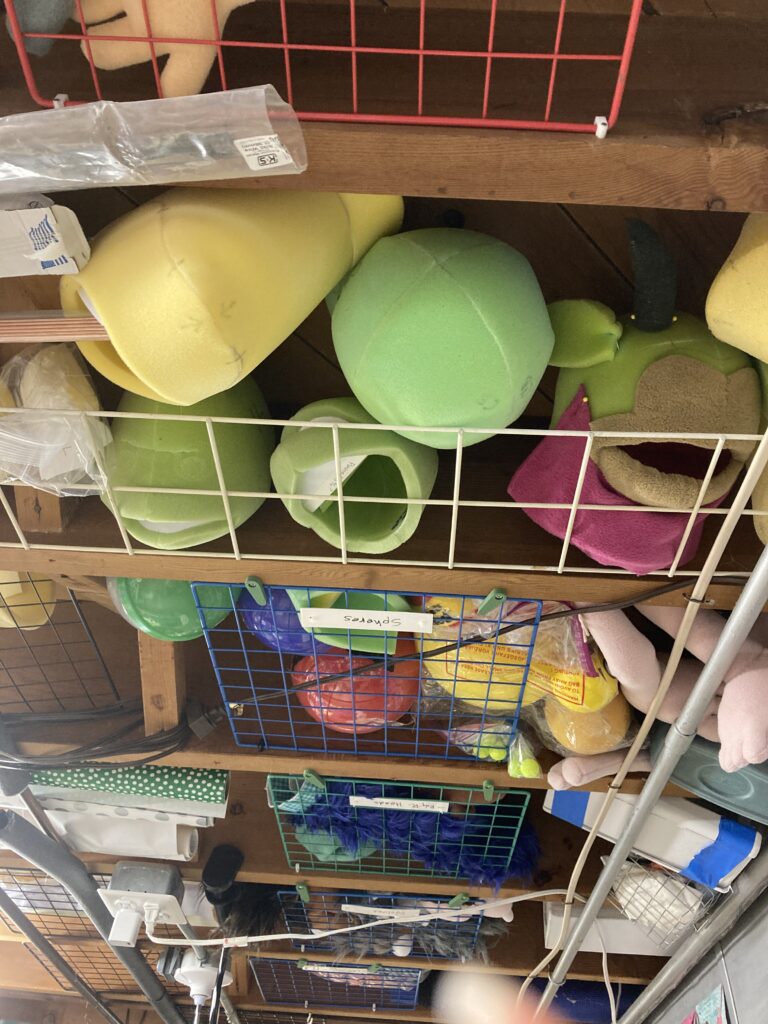
I have had my shop in my basement for over 20 years. In the last few years, I finally figured out how to use the space between the rafters. I created usable storage above my head using powder-coated steel grid panels. My friend Karen asked me about my “boneyard” one day, and I didn’t know the term. It’s where creative projects go to die or await resurrection when inspiration strikes. My rafters are like a boneyard for puppet foam prototypes, but it’s not for dead projects. It’s a reference library of head and body shapes. If I have a foam head shape that works for my next puppet project, I save time. I build the puppet based on the pattern I used to make the sample. I don’t have to design a new pattern. But I have so many patterns that I forget what I have and the exact shape and scale. Therefore, having puppet head and torso samples in my rafters is beneficial. It means I have an example of all the foam patterns I own. I can pull them down from storage to see if they will work for a new project. I then use them as a sketch reference when designing new puppets for clients. That sketch will help us decide on the look before starting the build. I recently added more storage for a set of new prototype heads. I decided to photograph and describe my process. You can use the idea to create basement rafter storage in your shop.
Adding to my Boneyard
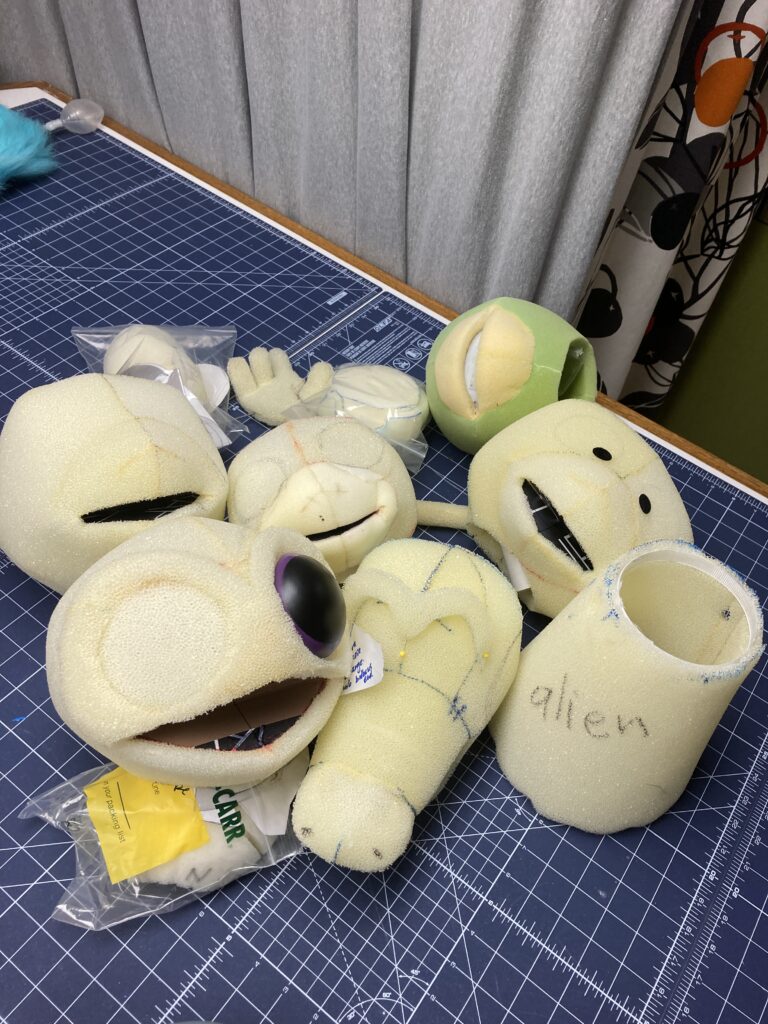
For example, here are the foam body parts I’ve patterned this year that need a home in my rafters. My current rafter storage is full, so I need to add more. Here are the materials needed to create this style of rafter storage.
Supplies You’ll Need
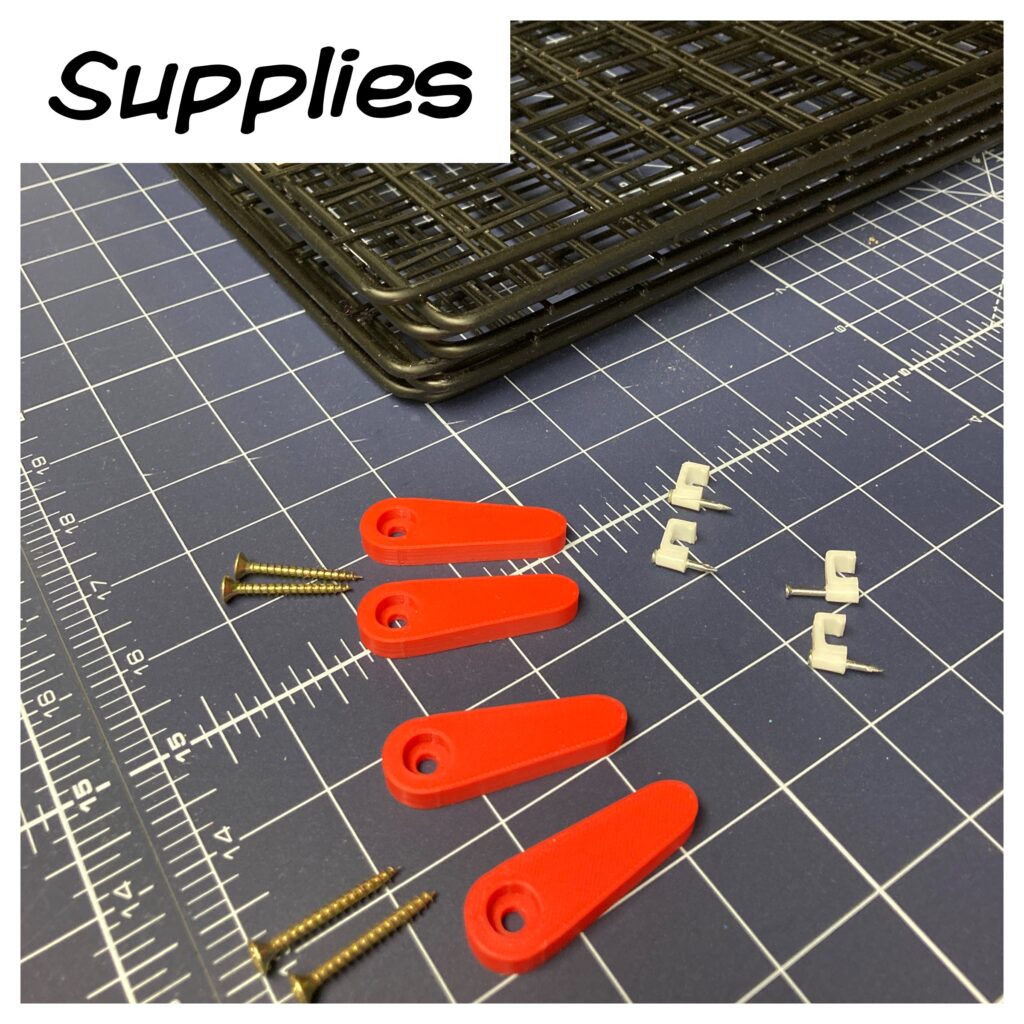
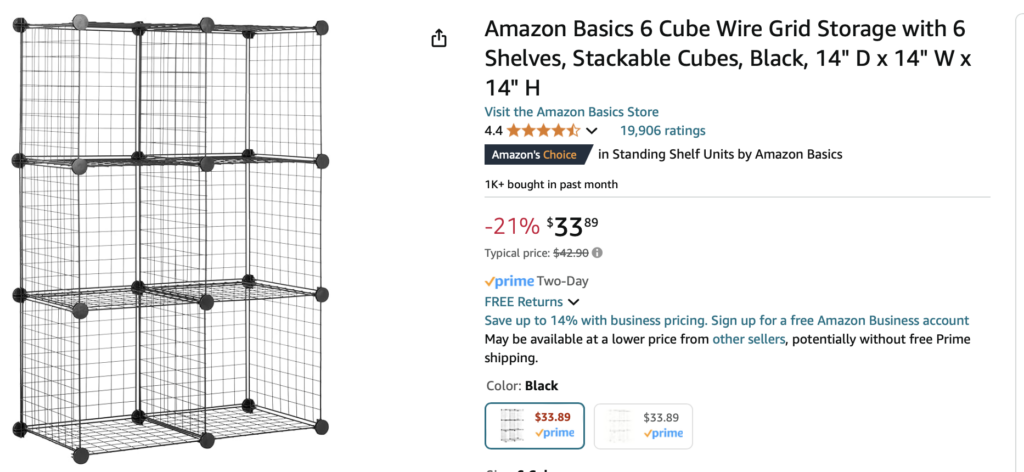
You’ll need leftover co-axial staples to use as hinges. Use leftover screws to add the 3D printed latches. Find stackable wire grid cubes from a thrift store or garage sale. Both times I bought these wire grid cubes second hand, they cost me $5. If you have money to burn and limited patience, you can find them online new https://www.amazon.com/AmazonBasics-Cube-Storage-Shelves-Black/dp/B0735GRJXY/ref=pd_ci_mcx_pspc_dp_d_2_i_2?pd_rd_w=mlfGh&content-id=amzn1.sym.568f3b6b-5aad-4bfd-98ee-d827f03151e4&pf_rd_p=568f3b6b-5aad-4bfd-98ee-d827f03151e4&pf_rd_r=XAW6EK881FBF3RD2FC2S&pd_rd_wg=O5nXp&pd_rd_r=345982b5-b891-42f6-affe-1737ad4e3352&pd_rd_i=B0735GRJXY&th=1 but getting them used is decidedly cheaper.
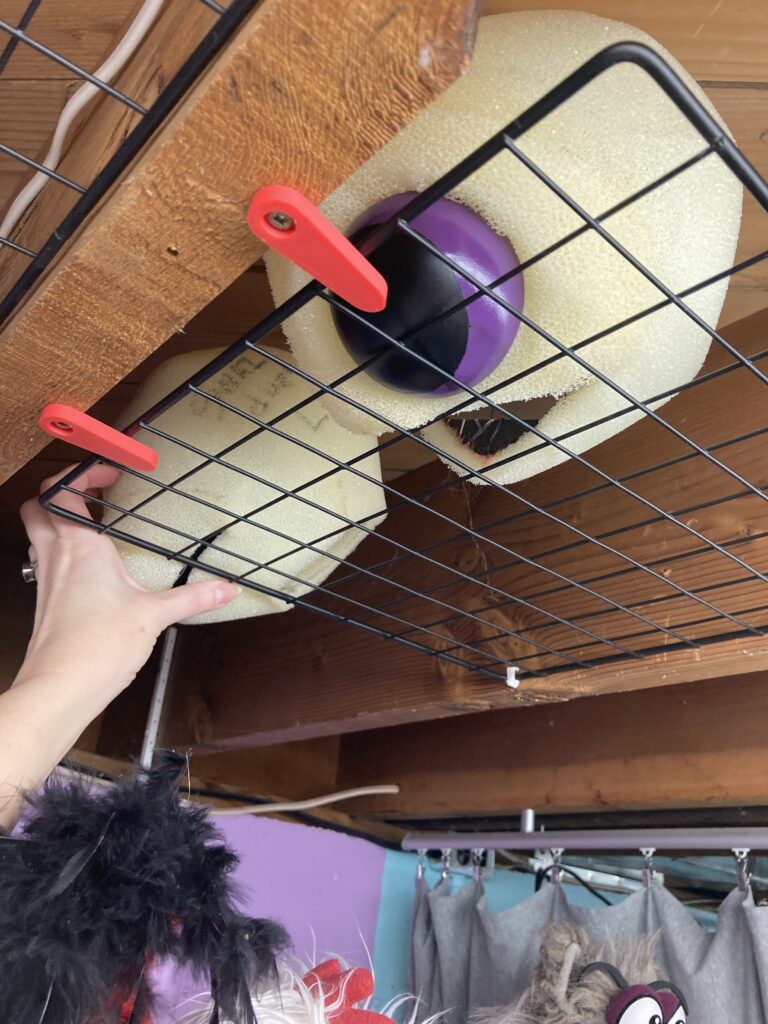
Directions
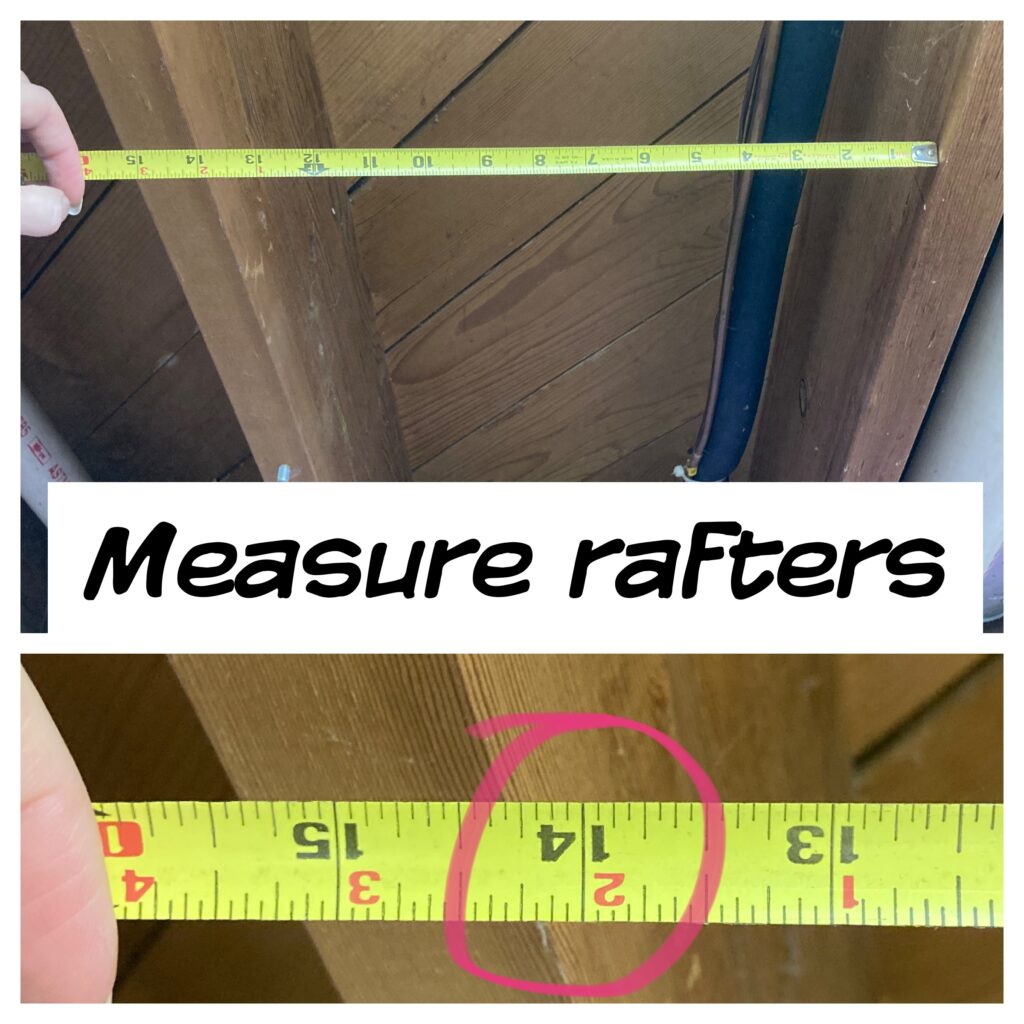
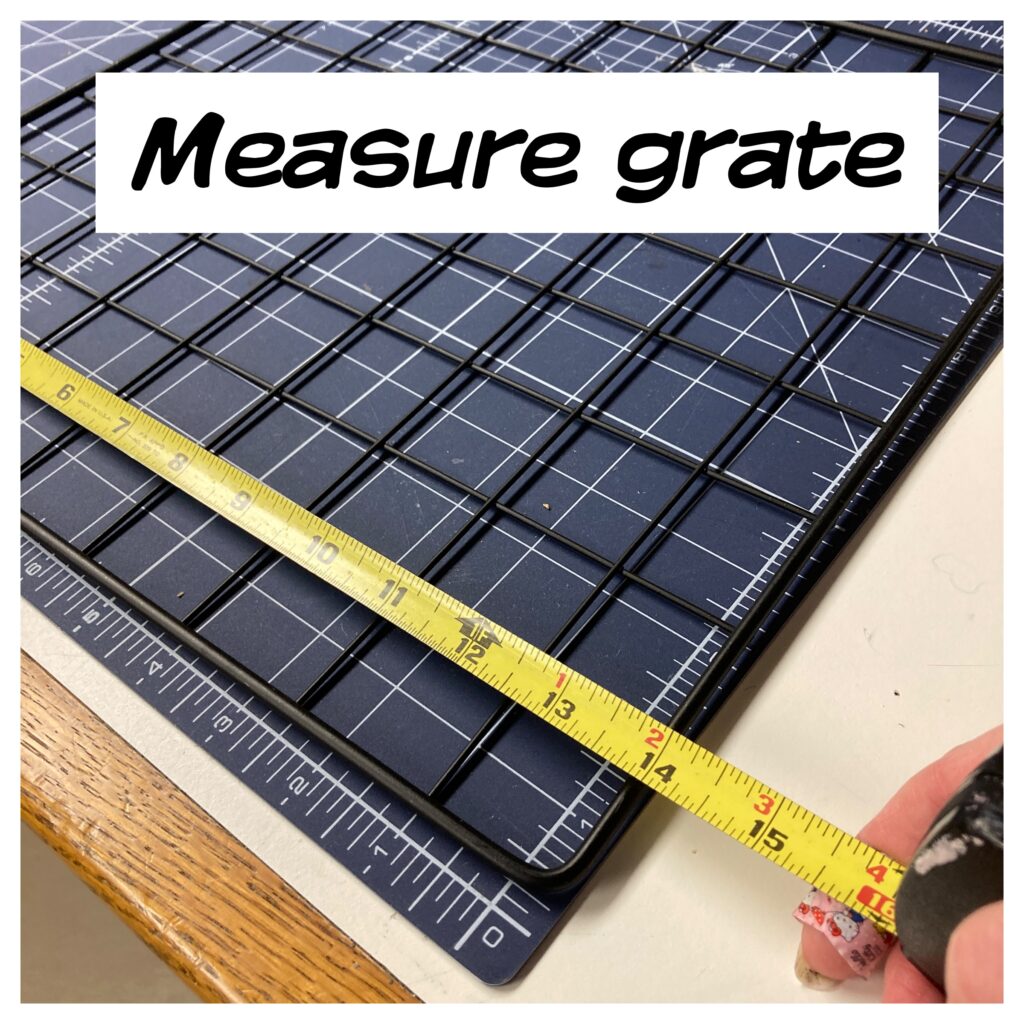
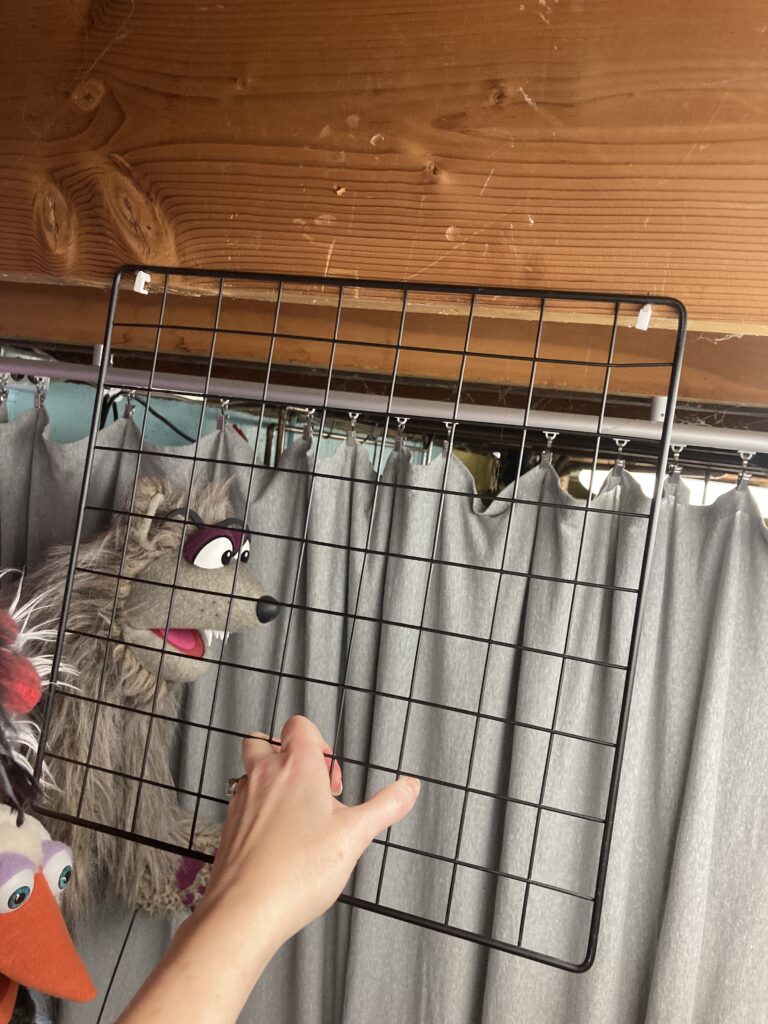
To make this idea work, ensure that the size of the wire grid pieces equals the distance between your rafters. My gap between my rafters is just over 14 inches. My wire grid pieces are exactly 14 inches. This is perfect. My latches and hinges allow the grid to rest nicely within the rafter gap.
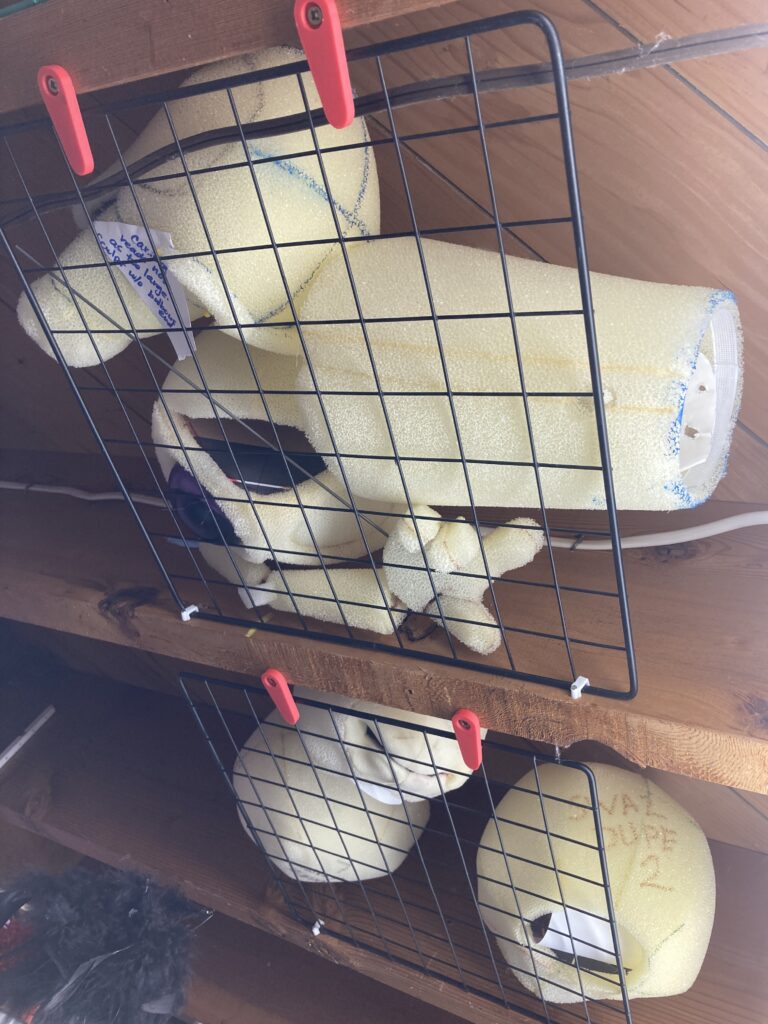
Use the gaps in the grate to determine where to add the coaxial staples. They create the hinges on one side of the panel.
Pound the staples in with a hammer on the bottom edge of the rafter.
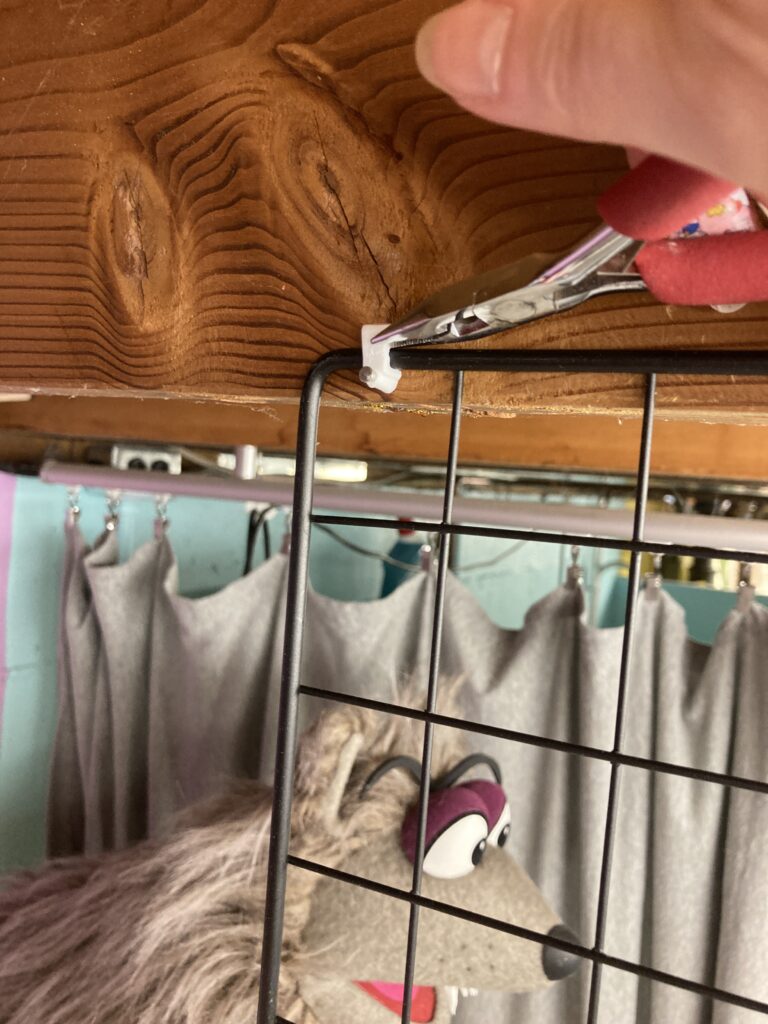
Use pliers to lift the plastic end of the co-axial staple. Place it over the grate edge to secure one end of the grate.
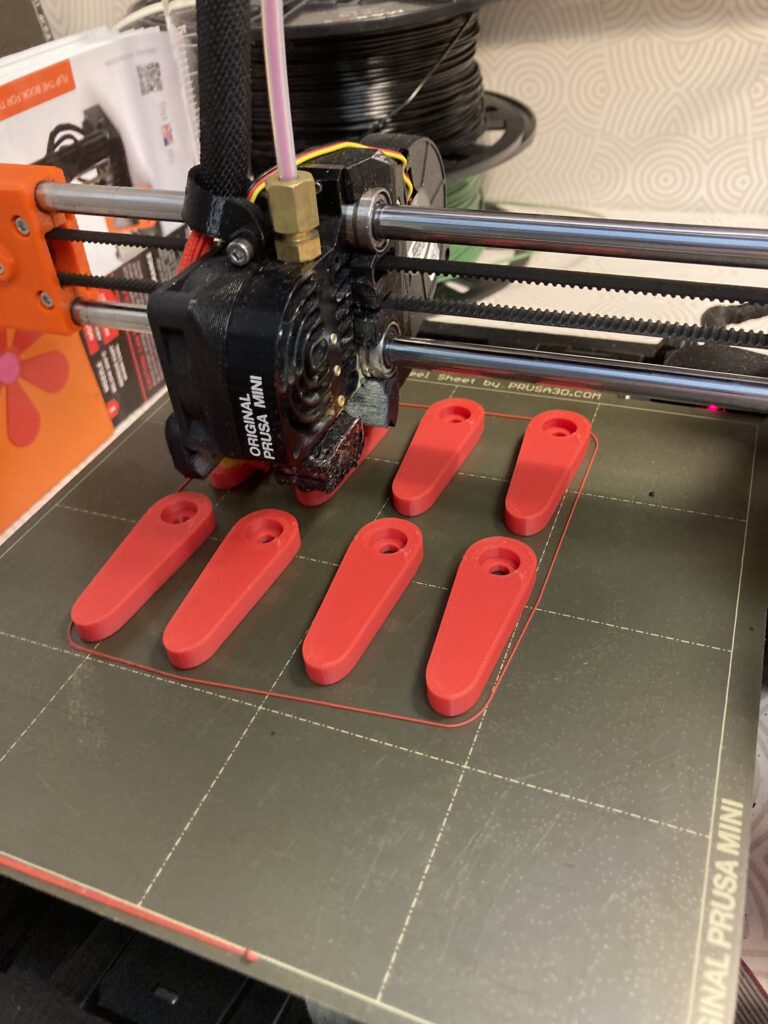
You can 3D print some latches. Alternatively, use a firm plastic scrap or wood scrap to cut out the functional equivalent of this latch. Since we are storing foam heads, the latch doesn’t need to support a lot of weight. The .stl file for my latch can be found on Printables here for FREE! https://www.printables.com/model/998643-plastic-latch
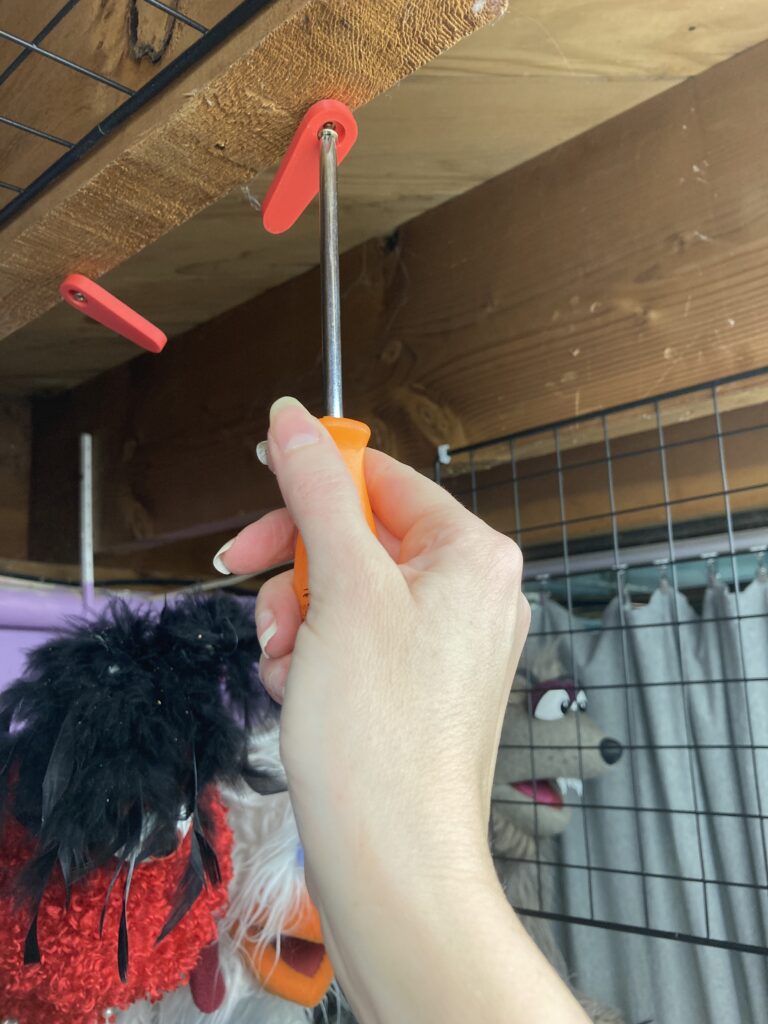
Predrill holes for the screws. Add latches with a power drill. Hand tighten or loosen to allow the latch to pivot.

Swing the grate panel up and latch in place.
How I Use My Basement Rafter Storage
I add my foam heads with the grate secured in place. I leave a gap on one side to allow for addition and retrieval. If a foam piece is hard to reach, I undo the hinges. If it is stuck, I let the foam bits rain down. I don’t plan on using these heads and torsos for client builds. They exist as references, so it’s OK if they are marked up and imperfect. I sometimes store the pattern for them folded up inside. Once they are used in an actual build the pattern lands in long-term storage in my flat file. See my flat file storage system in the blog post here: https://www.lapuppets.com/pattern-storage-and-project-bins/
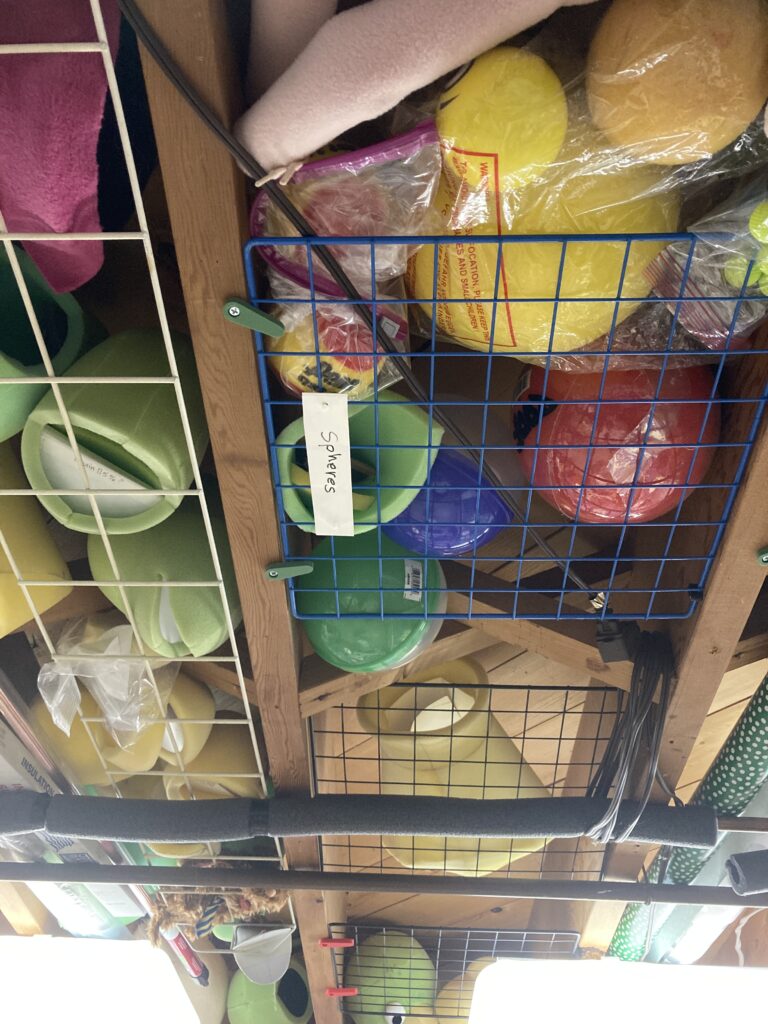
I also use this system to store foam balls, my puppet “mannikins” for designing costume patterns, and polyester fiber filling. Anything that is light and awkward to store can go up here. Come Christmas my kids know they can find the gift wrap up there above my work bench. It’s quite common for them to rush down the stairs on the day of a gift exchange. They do this to wrap up gifts for family.
The ability to see what is above the grate is handy. If you modify this idea, consider a material that allows for visibility. Another fun idea is using a flexible elastic cord to create a grid or zig-zag across the rafter gap. Foam heads can then be squished past the elastic barrier but be supported once you let go. I’d love to see your finished solution if you use this idea. You can email me at pam@lapuppets with a photo:)